How to Optimize Your Shopify Checkout and Recover More Sales
Cart abandonment sits above 70%. That’s a massive revenue drain.
And while marketers obsess over product pages and ad funnels, many ignore the final stretch: checkout.
Yet this is where the money’s made or lost. A clunky checkout experience can undo all your earlier conversion wins. Worse, it can cause buyers to walk away after they’ve already said yes in their minds.
The good news: Optimizing your Shopify checkout has outsized ROI potential.
But in 2025, you’ll need to work within Shopify’s new rules. Custom code is out. Checkout Extensibility is in. Testing has new limits.
This guide shows you what still works, what no longer does, and how to reclaim sales without breaking Shopify’s guardrails.
Shopify Checkout Customization in 2025: What’s Changed
Shopify’s checkout used to be customizable, if you were technical enough to dive into checkout.liquid. That era is over.
As of August 13, 2024, checkout.liquid is officially deprecated for core checkout pages (information, shipping, and payment). On August 28, 2025, thank-you and order status pages will follow.
If your store still relies on checkout.liquid, those customizations will be wiped. Shopify will automatically revert your checkout to the default experience.
Instead, you now have Checkout Extensibility, a new framework that’s:
● App-based: Customizations are made through apps and extensions
● Upgrade-safe: Changes won’t break with platform updates
● Sandboxed: Code runs in an isolated environment to protect performance and security
● Integrated with Shop Pay and designed to load fast across devices
But there’s a catch.
Only Shopify Plus stores can customize the in-checkout experience. Everyone else is limited to the thank-you and order status pages.
You also can’t run A/B tests on checkout UI elements right now. Extensibility doesn’t support conditional logic or audience targeting for showing/hiding components. And because extensions are sandboxed, you can’t inject JavaScript or tracking scripts into the flow.
So if you’re running Convert Experiences or another testing tool, you’ll need to test outside the checkout flow, on cart pages, landing pages, or post-purchase experiences.
That said, Shopify’s new system is faster, safer, and more consistent across stores. And that makes it a stronger foundation to build on, even if it changes how you test and customize.
Why Optimizing Your Shopify Checkout Matters
Every step in your ecommerce funnel earns the click. But checkout earns the cash.
It’s where intent turns into revenue… or doesn’t. And far too often, it doesn’t.
While brands sweat over ad copy and product pages, the most critical part of the journey gets neglected. The result? An average checkout abandonment rate of over 70%, costing ecommerce businesses hundreds of billions in lost revenue every year.
Let’s break that down:
- Cart abandonment: Someone adds to cart but never starts checkout
- Checkout abandonment: They start checkout… and then bail
The reasons range from surprise fees to security doubts, long forms, and payment friction. These are all preventable problems.
If your product page made the case to buy, the checkout needs to eliminate objections. Not introduce new ones.
Why Shoppers Abandon Checkout on Shopify
According to Baymard Institute’s long-running research, the top culprits behind checkout abandonment are:
- Unexpected costs (shipping, tax, extra fees)
- Forced account creation
- Lack of trust in payment security
And that’s just the top of the list. Other friction points include:
- Overly long or confusing checkout flows
- Poor display of total cost
- Unclear return or refund policies
- Website bugs or slow load times
- Limited or inconvenient payment options
- Declined or failed payment attempts

The good news is that every one of these issues can be fixed.
But the challenge: many brands still don’t treat checkout as an area for optimization. They treat it as a static endpoint.
That mindset leaves revenue on the table.
How to Optimize Your Shopify Checkout
Optimizing checkout is one of the highest-leverage ways to reduce abandonment, increase conversions, and grow average order value, without increasing ad spend.
Here are the strategies that still move the needle:
1. Streamline the Flow and Reduce Friction
Most abandonment happens because checkout feels slow, confusing, or like too much work. These tactics help simplify and speed up the experience.
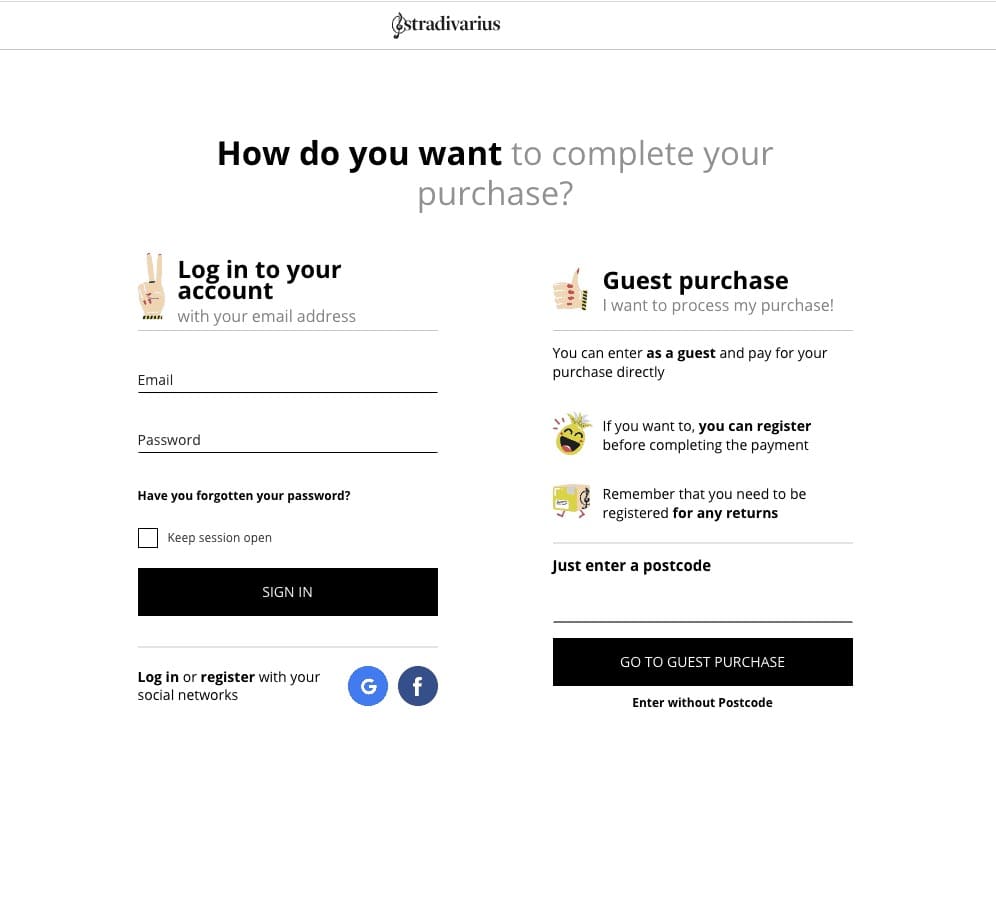
- Offer guest checkout: Forcing account creation adds unnecessary friction. Let customers check out first, then prompt for signup after.
- Enable address autocompletion: Shopify has this built in (Settings > Checkout). It reduces typing errors and cuts time-to-completion.
- Reduce unnecessary fields: Stick to essentials. Every extra field is a chance for drop-off. (Baymard reports 22% of users abandon due to long forms.)
- Optimize for mobile: Over 63% of sessions happen on mobile. Use large tap targets, autofill, sticky CTAs, and fast load speeds.
- Show a progress bar: Visually breaking down the process (e.g., Info → Shipping → Payment) sets expectations and builds momentum.

- Offer one-page checkout (Plus only): Shopify’s new one-page checkout reduces steps, but test performance. Some brands see better results with a multi-step flow.

- Pre-fill known info for returning users: Speed matters. Recognize logged-in or cookie-returning users and remove repetitive entry.
These form patterns are validated across 100 million (!) real-world examples; use them to create a frictionless Shopify buying experience.
2. Build Trust and Remove Doubts
Conversion drops when customers hesitate. These strategies reassure them during a vulnerable moment, payment.
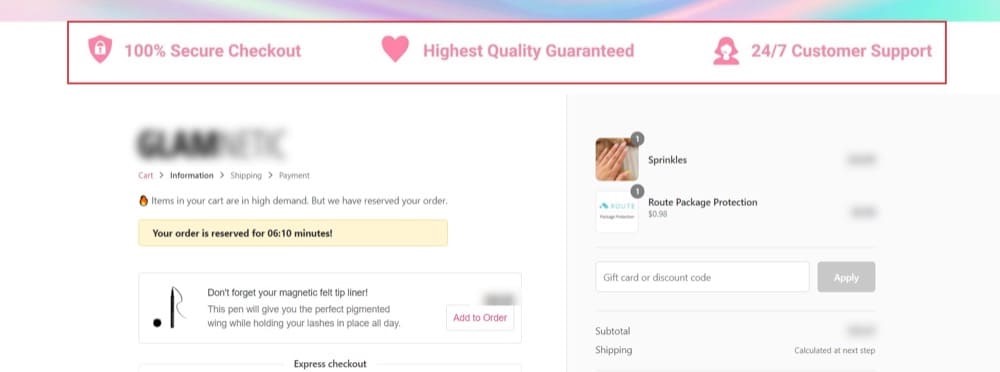
- Use 1-3 trust badges: Keep it clean. Display SSL badges, payment logos (PayPal, Visa), and one security seal without cluttering the UI.
- Display your return policy clearly: Don’t hide it in the footer. Reinforce low-risk buying with “30-day returns” or “Money-back guarantee” during checkout.
- Add live chat or contact info: Give hesitant shoppers a lifeline. Shopify Inbox makes this easy to implement.
- Highlight PCI compliance: Let visitors know Shopify is Level 1 PCI DSS compliant, and that their data is protected in a secure, sandboxed checkout.
- Show your sustainability practices: If you practice sustainability in your business, let your shoppers know. Environmentally conscious shoppers will go the extra mile to buy from businesses that align with their values.
Get Linda Bustos‘ 7 expert-tested sustainable messaging ideas to optimize your cart and checkout experience:
3. Offer More Payment and Fulfillment Flexibility
Let shoppers pay and receive their order the way they prefer.
- Add multiple payment options: Credit cards, Shop Pay, PayPal, Apple Pay, Google Pay, Klarna, Affirm, etc.—especially for mobile.

- Leverage accelerated checkout with Shop Pay: One-tap checkout for logged-in users. Converts up to 4x faster than guest checkout on mobile.
- Show total costs upfront: Include shipping, tax, and fees clearly, before the final step. Surprise costs are the #1 driver of abandonment.
- Offer free shipping or threshold incentives: “Free shipping over $50” works. Pair with a progress bar to nudge AOV.
- Support local payment methods (Plus with Shopify Markets): Dynamic fields and payment options based on buyer location increase international conversion rates.
- Show delivery estimates: Realistic, location-aware timelines reduce uncertainty and increase purchase confidence.
Examples: Linda Bustos shows brands that cleverly switched from ‘business days’ to ‘arrival days’ in their checkout messaging.
- Offer in-store pickup if applicable
4. Increase AOV Without Killing UX
Boosting average order value at checkout is a smart play, if it’s relevant and subtle. Here are some ways you can do this with care:
- Post-purchase upsells (Plus only): After the payment clears, offer a one-click add-on. This avoids disrupting the purchase moment.

- Cross-sell related products in cart: If you’re not on Plus, use the cart page. Relevance matters more than volume.
- Add tipping or donation options: For mission-driven brands or service-based stores, this works especially well.
- Show rewards or loyalty points earned: Reinforce brand stickiness and future purchases right at the point of sale.
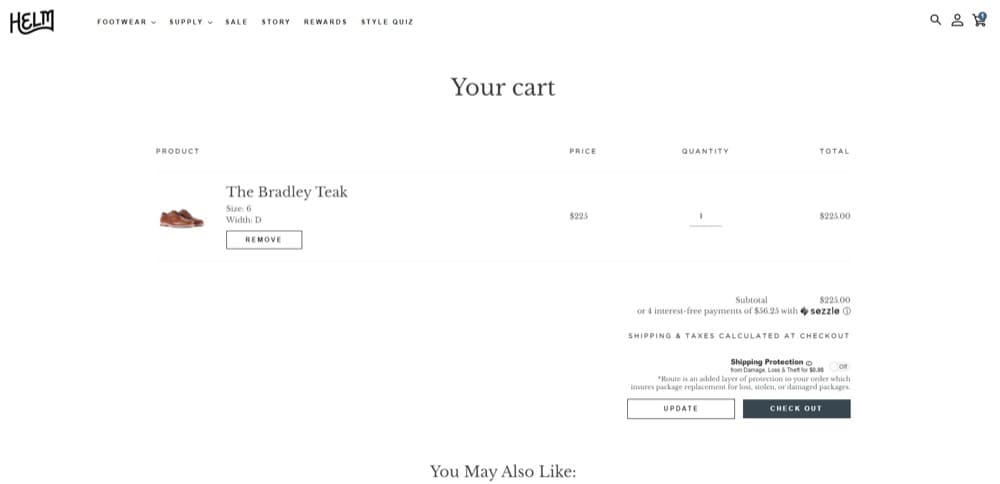
- Use visual cart thresholds: “You’re $7 away from free shipping!” progress bars are a powerful nudge.
Here’s Linda Bustos with a few examples of shopping cart animations that work:
5. Optimize the Experience, Not Just the Page
Even with customization limits, you can still make checkout faster, smarter, and more stable.
- Audit and improve page speed: Remove heavy apps or scripts that slow things down. Use Google PageSpeed or Shopify’s own diagnostics.
- Keep CTAs clear and action-oriented: “Complete Order” beats “Submit.” Reduce ambiguity at critical moments.
- Avoid overloading checkout with third-party code: Extensibility helps here. Stick to well-built apps to reduce load bloat.
- Enable checkout abandonment emails: Shopify lets you set this up in the admin. Follow up with urgency, clarity, and (if appropriate) incentives.
- Stay up-to-date on Shopify app and extensibility updates: Over 400 checkout apps now use the new framework. Review them periodically for new capabilities.
Shopify Checkout Optimization Checklist
| Task | Why It Matters | ||||||||||
|---|---|---|---|---|---|---|---|---|---|---|---|
| Offer guest checkout | Reduces friction for first-time buyers who don’t want to create an account | ||||||||||
| Enable address autocompletion | Speeds up form filling and reduces typos | ||||||||||
| Reduce the number of fields | Cuts drop-off by minimizing cognitive load | ||||||||||
| Use one-page checkout | Fewer clicks, faster completion (test performance impact) | ||||||||||
| Pre-fill info for returning users | Saves time and improves mobile UX | ||||||||||
| Show a progress bar | Sets expectations and keeps users moving forward | ||||||||||
| Display trust badges (limit to 1–3) | Builds buyer confidence at the decision point | ||||||||||
| Highlight return/refund policy during checkout | Removes objections and perceived risk | ||||||||||
| Offer live chat or visible contact info | Provides real-time support and builds trust | ||||||||||
| Use accelerated payment methods (Shop Pay, Apple Pay, etc.) | Reduces steps, especially on mobile | ||||||||||
| Offer multiple payment methods | Increases accessibility and global conversion | ||||||||||
| Display total cost early (incl. shipping & tax) | Prevents abandonment from surprise fees | ||||||||||
| Use upsells or post-purchase offers | Increases AOV without disrupting the main flow | ||||||||||
| Show loyalty rewards or progress bars | Encourages larger carts and return purchases | ||||||||||
| Optimize checkout for mobile | Mobile has the highest traffic but the highest abandonment | ||||||||||
| Send checkout abandonment emails | Re-engages warm leads and recovers lost sales | ||||||||||
| Minimize third-party scripts in checkout | Improves speed and reduces breakage risk | ||||||||||
| Use Checkout Extensibility for UI edits | Secure, upgrade-safe customization layer | ||||||||||
| Leverage Shopify Functions for advanced logic | Enables custom payment or shipping rules | ||||||||||
| Use Pixels + Webhooks for event tracking | Provides standardized analytics under the new framework |
Conclusion
Checkout is where your revenue either locks in or leaks out.
And while Shopify’s new Checkout Extensibility framework changes how customizations work, it doesn’t change the fundamentals. Speed, trust, clarity, and relevance still win.
The strategies we covered—whether you’re on Shopify Plus or not—are all about reducing friction, increasing confidence, and making it easier for shoppers to say yes.
Shopify checkout optimization is a continuous process of removing blockers, testing improvements, and aligning the final moments of the funnel with how your customers think and buy.
Start small. Fix what’s obvious. Then experiment with what’s not.
And if you’re looking to test changes on Shopify with confidence, Convert Experiences is ready when you are.
Frequently Asked Questions About Shopify Checkout Optimization
What Is Shopify Checkout?
A Shopify checkout is where buyers collect shipping info and payment details from a customer so customers can pay for the products in their cart.

The last time you went to a supermarket, you took your basket full of groceries to the cashier at the checkout counter. This is where you paid for the items, had them packaged, and got your receipt.
It’s quite the same process in eCommerce — only digitized and processed over the internet.
Is It Possible to Conduct A/B Tests on Shopify Checkout Pages?
No. Since Shopify rolled out the checkout extensibility update to everyone in August 2024, Shopify checkout A/B testing is no longer possible.
This is because direct JavaScript injection, the way most Shopify A/B testing tools ran tests on Shopify checkout pages, is no longer supported. Immediately this changes (i.e., checkout A/B testing is supported once again), the Convert Shopify App will be updated, and we’ll put the word out.
How Is Shopify Cart Different from Shopify Checkout?
The Shopify cart is the part of the online store where the chosen (or added-to-cart) items are listed with their price tag and other info just before the checkout step.
For all Shopify merchants (Shopify Plus and other membership tiers), this page is customizable in the store’s theme editor.
So, you can add upsells, cross-sells, countdown timers, and more. And you can also customize the page’s look and feel to fit your brand. The only thing you cannot customize is the inputs from the customer (the products they chose).
The checkout page is more standard and has limited customizability for non-Shopify Plus members. This page is where you collect customer payment and shipping info to complete the order.
Is it Possible to Customize the Shopify Checkout Experience?
Yes, but the level of customization depends on your Shopify plan.
All merchants can:
- Add brand elements like logos and colors
- Use Shopify-approved checkout apps (e.g., trust badges, express pay integrations)
Shopify Plus merchants get much more through Checkout Extensibility:
- Advanced conditional logic using Shopify Functions
- Custom checkout blocks and UI extensions
- Post-purchase upsells
- Enhanced styling via the Branding API
- Dynamic payment/shipping rule sets
In short, checkout customization is now safer, more scalable, but much more restricted.
How Do You Check if the Shopify Checkout Mode Is Disabled?
If you encounter errors at checkout (or your customers do), chances are your store doesn’t have an active payment setup.
To verify:
- Go to Admin > Settings > Payments
- Look for the Manage button in the payments section
If it’s missing, Shopify Payments hasn’t been set up yet.
Once your payment processor is active, your checkout should work normally. Shopify’s help docs and tutorial videos can guide you through setup if needed.

How to Work with Shopify Payments?
Shopify Payments is a payment processor you can enable on your store to receive payments from customers via their credit cards. It’s only available to supported countries.
The amazing thing about Shopify Payments is that it’s the smoothest payment integration with Shopify stores. So, you get:
- Faster checkout, since the payment flow is a breeze
- Automatic dispute resolution that helps you win more chargebacks
- More orders completed as Shop Payments rejects fewer transactions than other payment processors
- A payment platform that supports offline access
- More options to accept payments from customers
But it comes with some cons. We’ve already mentioned that this is not available in every country. There’s more…
- High chargebacks — some when a customer disputes a charge, you’ll be debited $15 (but they do help in preventing this by giving the customer’s bank every detail of the transaction)
- Your Shopify Payment will be frozen while a dispute is being resolved.
That said, two ways you can optimize the payment experience for your customers is by
- Increasing the speed of payment. If the checkout process takes more than 30 seconds, 50% of US shoppers will be less likely to complete the purchase. And…
- Providing more payment options. The more options available, the more open your arms are to receiving revenue.


Written By
Uwemedimo Usa, Dionysia Kontotasiou


Edited By
Carmen Apostu