Local LLMs Part 3: How to Set Up a Local LLM Server Using LM Studio and Ollama
The chat interface is a great way to get started with AI. I mean, what could be more accessible than simply having a conversation with a new piece of technology? But there comes a point when the chat interface becomes limiting.
For instance, suppose we wanted to thoroughly test a large (or small) language model? You’ll need to test your prompts hundreds, maybe even thousands of times. Also, what if you wanted to create workflows with your LLM? What if you wanted to build your own private chat tool?
This is where the chat interface is limiting. And the solution is to give application access to your LLM. Sounds scary and complicated, right? It’s actually pretty simple. And in just twelve minutes, you’ll have set up your own server to host that new small model you’ve found.
Let’s get into it.
Getting Started with LM Studio
Finding the Right Model
Before I get started, I want to announce that I’ve found a new favourite small model. It’s called Gemma 3, and it’s the 270 million parameter variant, optimised for MLX (i.e., optimised for Apple M series of machines).
If none of that makes sense to you, it’s likely you haven’t watched my previous guides; I’d recommend referring back to those.
Anyway, Gemma3 works great for my use case and setup. I’ll be using this moving forward (until Qwen4 comes out). So now, I want to set this model free so I can use it beyond the confines of the LM Studio interface.
Using LM Studio to Set Up a Server
The first method to make Gemma available as a server is easy: use LM Studio’s Developer Mode. Here’s how:
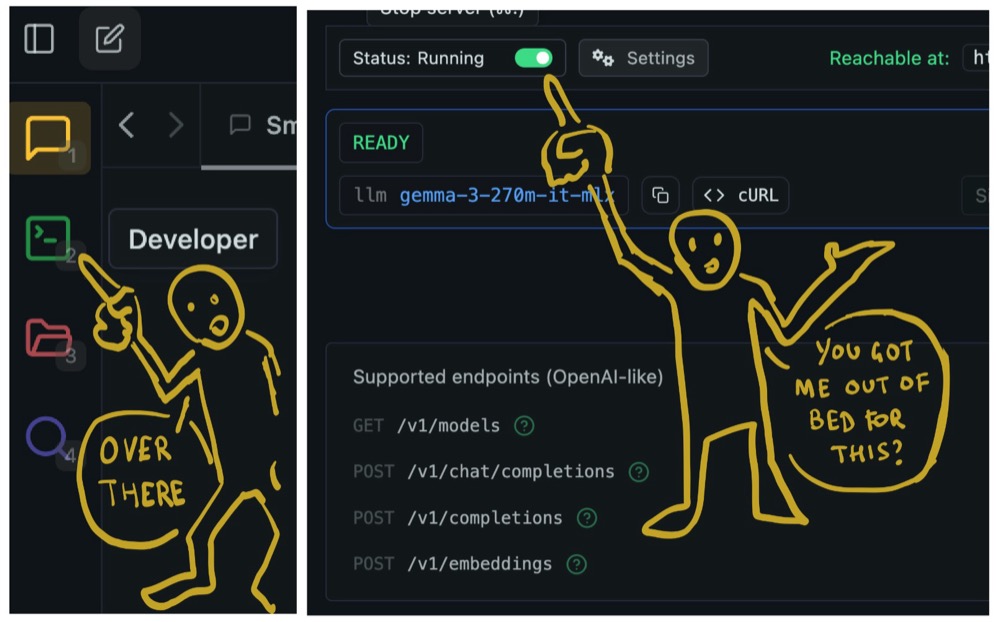
- Open LM Studio and navigate to the left sidebar.
- Click on Developer Mode and uncheck the Status to make it active.
- Erm. That’s it.
Now, on the top, you’ll see the API’s URL address. This is the address for your application to communicate with the LLM.
Understanding APIs
We humans have the chat interface to directly communicate with the LLM. Now, applications can also use the chat interface, but that’s inefficient.
It’s much better to give them their own way to communicate. Their own interface. That’s what an API (Application Programming Interface) is designed for. They’re there to facilitate application-to-application communication.
And just as we have tabs and sections in our UI to clearly separate aspects of the application by purpose, APIs have endpoints. They’re the equivalent of the tabs in LM Studio.
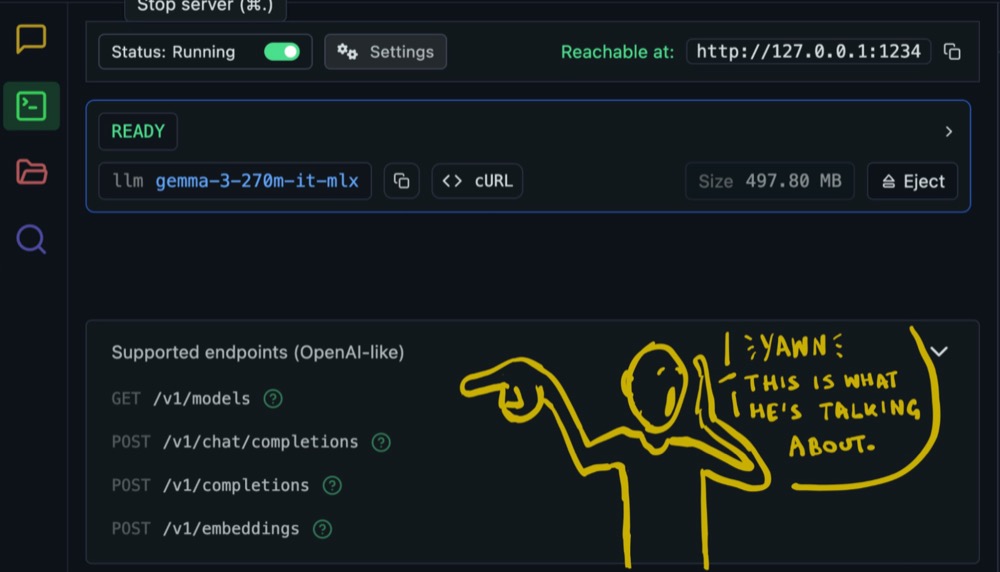
These endpoints allow applications to interact with the LLM effectively. If they want to know what models are available, they can get a list from get models. Want to use the models to generate text? Use chat completions.
Now, in the spirit of empathising with LMs, let’s simulate what this application interaction might look like, so we can test if it all works.
Setting Up Your Workspace
Let’s get comfortable with our workspace:
- One Side: A chat tool like ChatGPT or Gemini Flash. This will help us when we get stuck working in the terminal.
- Other Side: A terminal for simulating application interactions. Windows users can use Command Prompt or Shell—it works similarly.
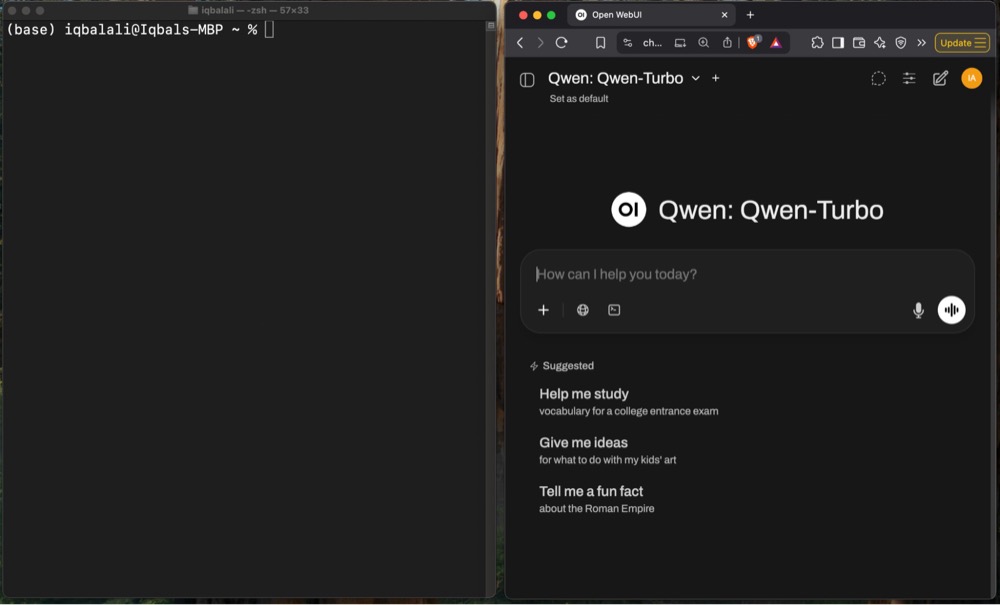
I know using the terminal sounds scary, but it’s actually really easy once you’ve used it a couple of times. Also, it’s the best way for AI to help you when you get into trouble. You can just copy and paste commands to and from your AI chat window.
Testing Our API Works
The command we’re going to use is cURL , and it just stands for “call” URL. And all it does is it “calls” URLs. Here’s how to use it:
- Copy the API URL from LM Studio.
- Open your terminal and type:
curl {paste_the_url}/v1/models
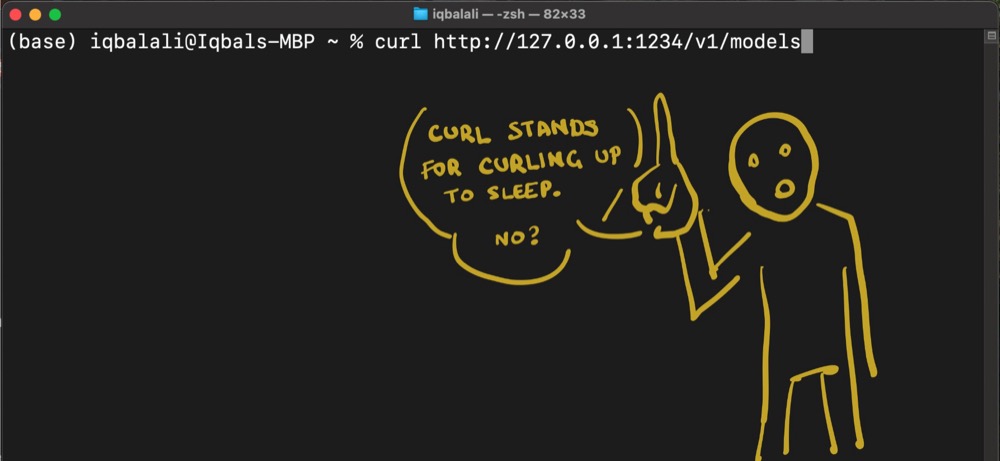
This command fetches a list of models, just like you saw in the LM Studio UI. Great, we’ve confirmed our API works. But, here’s the thing: while LM Studio is great for “shopping” for models, it’s not ideal for server use. To do this, we need to use another application called Ollama. And Ollama is very much like LM Studio, but it’s more optimised towards building stuff with LLMs.
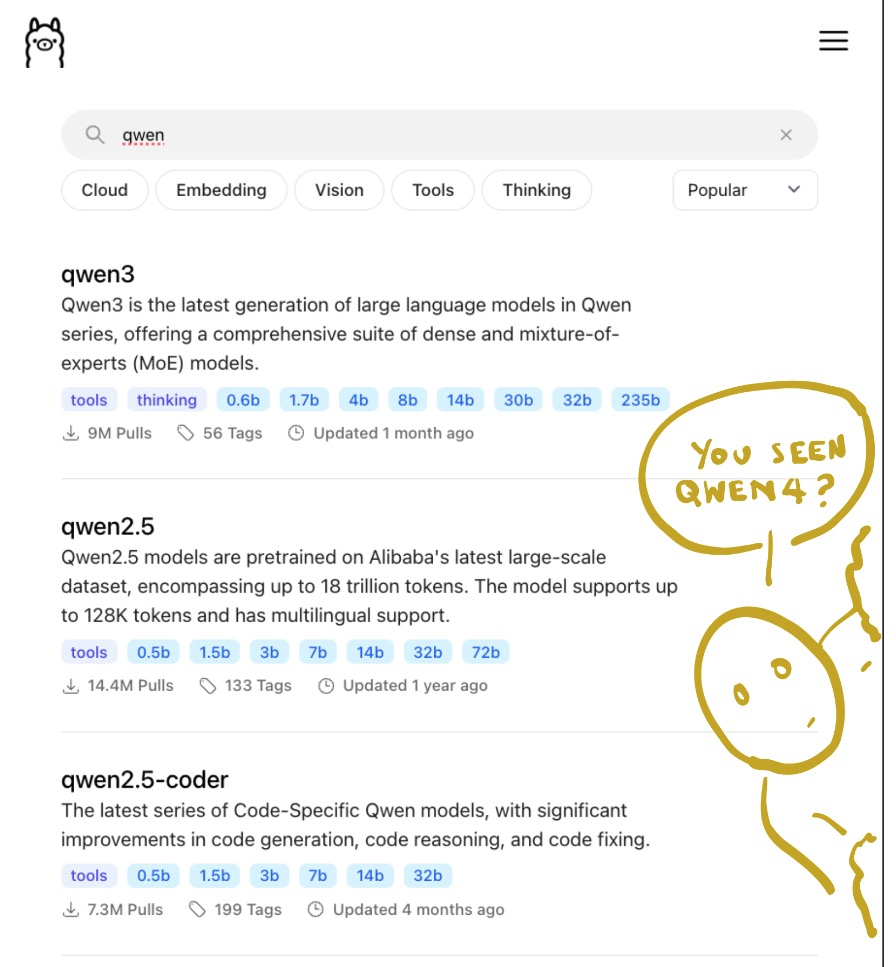
If you visit the site and browse the models, you can see a list of all the models that are available.
Installing Ollama
You can download and install Ollama like any other application. Just download the relevant application for your operating system.
Once you start Ollama, you’ll see a familiar chat interface where you can pick and test models. But we’re not going to use the interface. Now that we’re Terminal ninjas, we’re going to use the Terminal.
In your workspace:
Open the terminal and type ollama to see available commands (e.g., create, show, run).
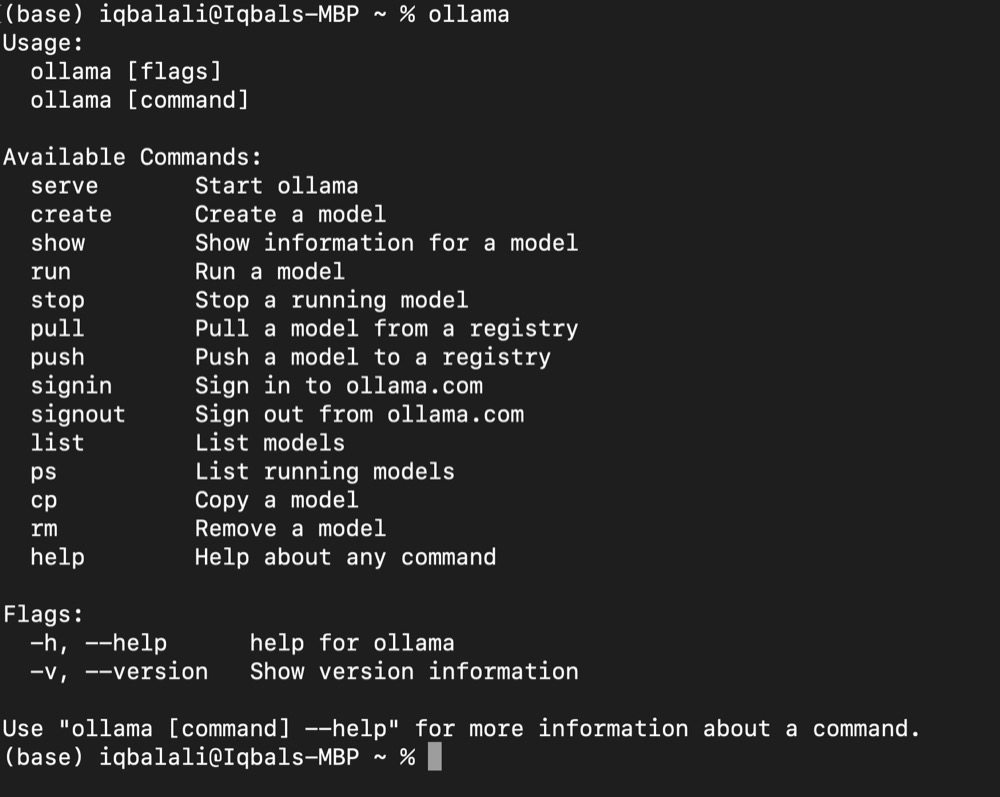
Try using a command like run:
ollama run
You’ll get an error and a complaint about ‘args’. Args is short for Arguments and these are modifiers to make commands more specific. I mean, you say, ollama run, but run what?
Let’s approach this with a semblance of a plan.
Step One: Find Your Model
On the website, browse the models section and find your model, and copy the model name. For me, it’s gemma3:270m.

Step Two: Pull the Model
In the terminal use:
In the terminal use:
ollama pull gemma3:270m
Replace ‘gemma3:270m’ with the model you’ve picked. Ollama will now download the model for you to use.
Step Three: Run the Model
And now you can run the model:
ollama run gemma3:270m
This will enter you into the chat session. Prompt like you’d prompt in your chat interface. When you’re done, either usethe Ctrl + d shortcut or type ‘/bye’ to close the chat session, because we didn’t do all this to use the chat in the Terminal.
Step Four: Start the Server
Want to start the Ollama server? Concentrate on this, because this is going to be complex:
ollama serve
And that’s it. You don’t even need args to get a basic server running. Somewhere in all those messages, there’ll be something that looks like:
OLLAMA_HOST:http://127.0.0.1:11434
That’s the address your server is running on. Now, if you open another Terminal window (don’t want to interrupt the server), we can use this address to test it:
curl 127.0.0.1:11434
We can also use:
curl localhost:11434
We’ll get a reply to confirm the server is running.
Ollama is running
If we close the server Terminal window, the server stops. We can also stop it with the Ctrl+c shortcut. If we wanted to keep it running in the background, we can use:
curl serve -d
Now, this might be enough for most cases. But it’s important to remember that by default, Ollama is only accessible locally. We might want to allow other devices or applications (even if they are on our own machine) on our network to access the server. To do this, we need to widen access to Ollama.
Step Five: Give Wider Access to the Server
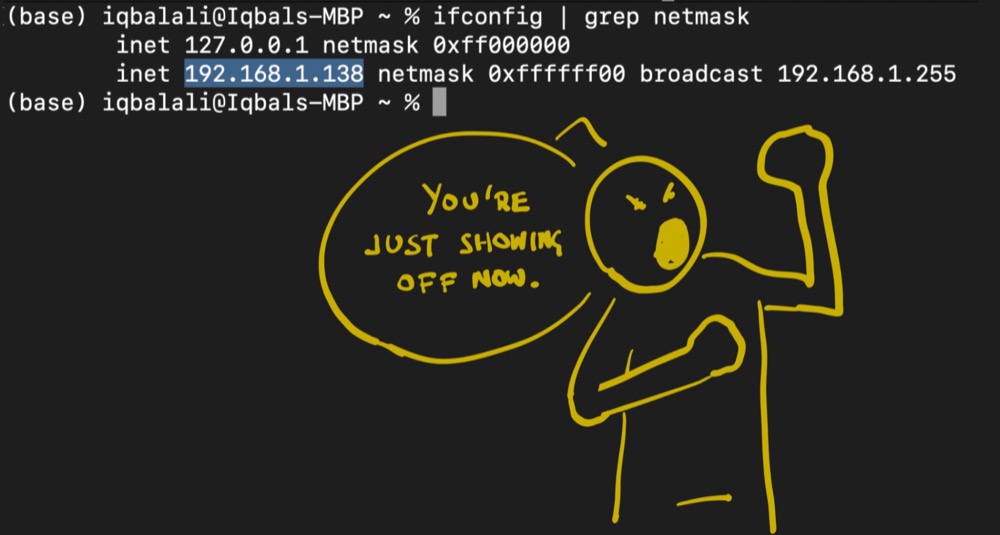
The first step is to determine what our local network IP address is. If we don’t know our local network address, we can find this out in the Terminal:
ifconfig | grep netmask
The ifconfig part prints out everything to do with our network. It’s a lot of information, so it might be useful to filter it down to the mention of ‘netmask’. The pipe grep netmask does just that. We should now have our local network IP address.
All we need to do now is set our environment variable to broadcast the server locally. We saw this variable earlier when we started our server; the variable is called OLLAMA_HOST.
Stop the server, if it’s running. Then use:
export OLLAMA_HOST=0.0.0.0
export OLLAMA_HOST=0.0.0.0
ollama serve
And our server is running with that variable.
We can now test access from another terminal or device using the IP address.
curl {your_ip_address}:11434
You should get the familiar message that ollama is running. That’s it!
Next Steps and Gotchas
Here are some gotchas to be aware of. Your local IP address may change from time to time. This is because it’s common for routers to set your IP address dynamically. You can make your IP static if that’s a problem.
Congratulations! You’ve now set up your Ollama server. You can now go on to connect other applications like local n8n instances to create workflows. You can also write scripts to test your new local model. You can even set up a simple chat interface that works completely local to your machine.
Editor’s note: This is part of our series on running AI locally. For the full picture, check out our intro to small language models, how we beat ChatGPT 5 with a tiny model, and how to build a personal chat interface. If you’re interested in what small models can pull off, you might also like smaller models, smarter prompts, and the lessons from “strawberry-gate” and our guide on why AI hallucinates and how to keep it honest.


Written By
Iqbal Ali
Edited By
Carmen Apostu