What Is A Data Management Platform (DMP) in A/B Testing?
What Is a Data Management Platform (or DMP)?
A data management platform (DMP) is a critical tool for any business looking to improve its marketing efforts. It is used to collect and analyze data (first, second and third party) and make it available to other platforms to be used for targeted advertising, personalization, and more.
Simply put, a DMP is a martech tool that collects data about a person’s interactions with a brand. It can then interpret this data to understand how a person feels, what they want to do, and where they want to spend their money. When a company needs to decide which ads or content to show someone, they can use the DMP to collect information about that person and customize their initiatives.
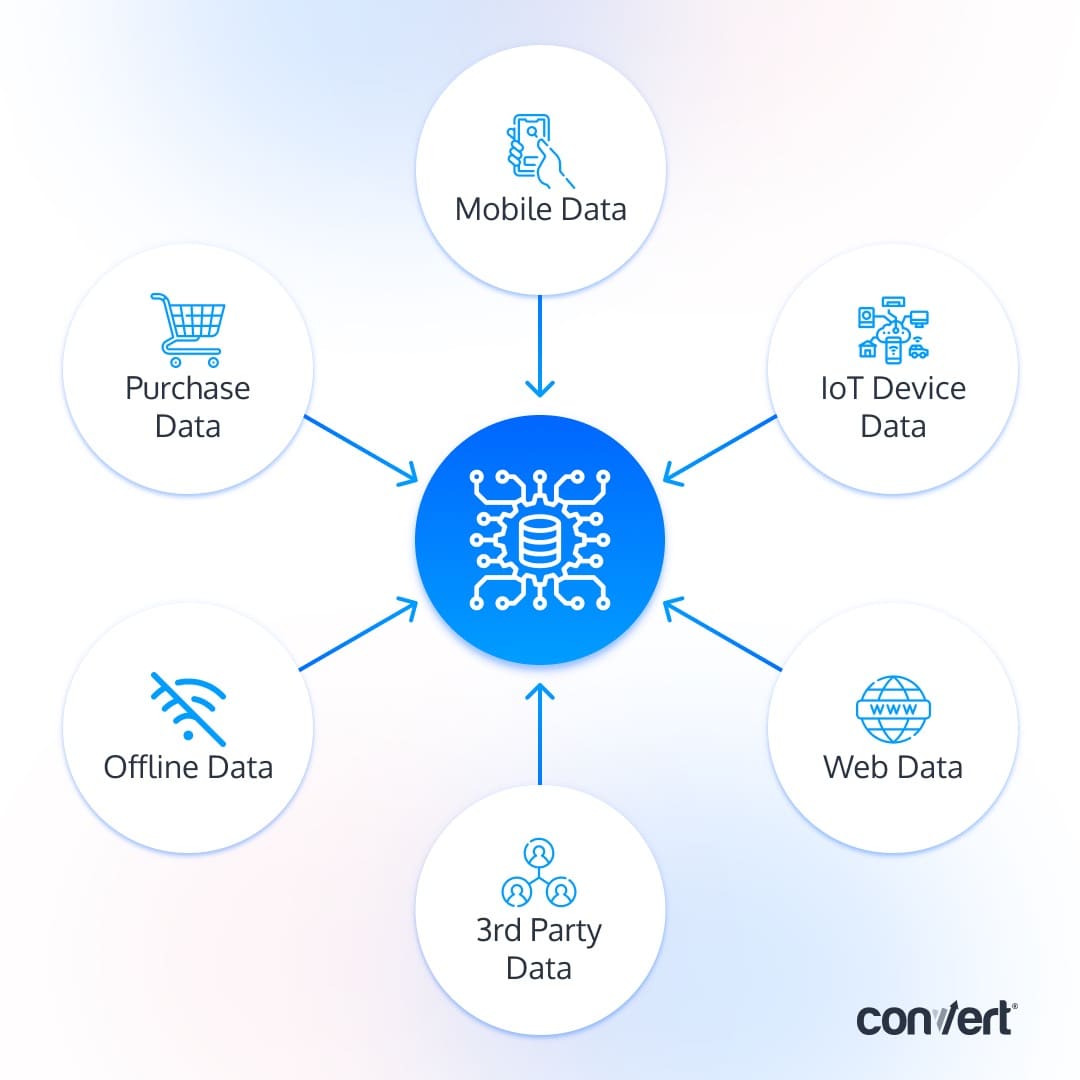
Information is stored in cookies or Javascript variables (a few examples of these below) that can carry values from multiple touchpoints in the customer journey like user behavior, CRM data, mobile data, purchase data, social media interactions, etc.
What Is a DMP Used for?
The data collected can then be turned into custom audience segments for improved tracking and targeting. Marketers often use DMPs for driving customized user experiences, allowing them access into the hearts of their target audiences.
DMPs also help marketers bridge the gap between online and offline marketing.
With robust data sets from customer relationship management systems (CRMs), APIs, social media, or offline sources—a single customer segmentation and experience management platform can manage all aspects of this process to provide your customers what they want: seamless connections between their web visits and real-world interactions.
DMPs and Data Sources
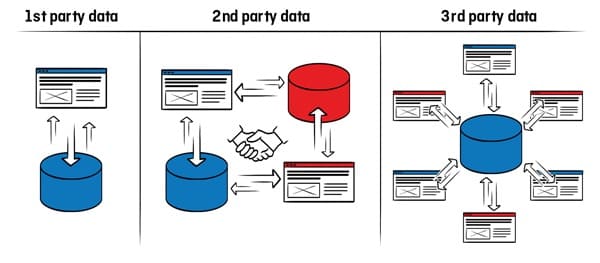
Data that can be collected and organized in a DMP can be classified into three main categories:
| First-party data | Data collected directly from website visitors while navigating your site, your internal CRM system and APIs, social media interactions, subscriptions, mobile devices, and apps. | ||||||||||
|---|---|---|---|---|---|---|---|---|---|---|---|
| Second-party data | This second category impacts the first-party data of someone else. If you have an agreement with a supplier/business partner or a mutually beneficial relationship with another company, then you can use their data as a second party to enrich your DMP. | ||||||||||
| Third-party data | 3rd party data comes from apps, plugins, scripts that you do not own and can be combined with first- and second-party data to reach a wider audience. |
First-party data, of course, is the standard that should be used in a DMP, especially with all Privacy Regulations (GDPR, CCPA, ePrivacy, etc.) that have come into force the last few years.
Still, some organizations do not have enough first-party data to be impactful. With the right data partnerships and a DMP in place, they too can access rich datasets outside their immediate capabilities or reachable audiences.
DMP Architecture: How Does a DMP Work?
To use a DMP effectively, you need to first understand your business requirements and types of data sources. In other words: What audience data do you need and what profiles do you need to target?
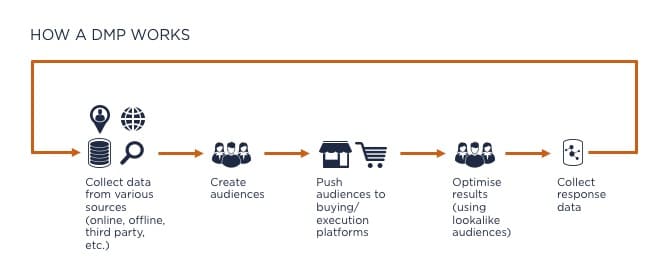
Once you’re clear on that, you can set up your Data Management Platform to collect data from sources that are relevant to your business.
After the data is collected, the DMP organizes it into categories or taxonomies and builds up anonymized, unified customer profiles. The DMP then shares the audience information with demand-side platforms, digital advertising platforms, and in-house marketing channels so that they know who should be served certain ads or content.
By analyzing your first-, second-, and third-party data (demographic, contextual, and behavioral) about your users, you can understand who your customers are, place them into targeted audience segments, and serve them personalized experiences.
When you visit a website, you’re likely to see ads for similar products on other channels you interact with in the following days or weeks.
That’s a DMP at work.
What data does a DMP collect?
Let’s assume we have a DMP with categories for users that can be targeted with ads and who are music lovers. Anyone who has visited a music blog or site that has a DMP enabled can be categorized as a music lover. This information can also be combined with other sources of customer behavior data, like their desktop activity or web browsing.
A DMP can also link user profiles that share the same characteristics. For example, women between 25 and 35 who watch the series “Friends” can be grouped into an audience that receives the same marketing messages and ads. This is called lookalike modeling.
How to Link a DMP to Your A/B Testing Tool
These days, users have a large number of choices when it comes to making purchases. They can go to a shop, order by phone, online, or even through their smartphone or tablet. A DMP can gather information from all these places, analyze it, and sort it to create specific audience segments.
And in order to target your A/B tests and personalizations accurately, you can send data from your Data Management Platform to your A/B testing platform. This will help you ensure that you are displaying the right message, to the right people, at the right time.
Using a DMP can enhance your online marketing strategy. Combined with your A/B testing platform, it improves your user experience and therefore increases engagement on your website.
Integrating a DMP with your A/B testing platform requires building a bridge to allow both platforms to communicate and share data.
Once the bridge is set up, your A/B testing platform can retrieve a segment from the DMP in milliseconds. This mechanism is then repeated every time a page loads.
We’ll go over this process in detail below, but here’s the gist of it. To make this work, in the segmentation criteria for your tests and personalizations, you’ll need to configure specific segments to allow the tool to retrieve data from the DMP. Your A/B testing platform will then gather the data from the DMP and use it to target experiences.
Why Include a DMP in Your A/B Testing Strategy?
By linking your A/B testing platform with your DMP, you can customize your messages to encourage engagement and provide the best customer experience possible.
There are two main reasons for adopting a DMP into your A/B testing strategy:
For Better Audience Targeting
By combining your A/B testing platform with a DMP, you can deepen your user targeting abilities.
You can use first-party data about your website users, together with second- and third-party data to enrich your audiences and run truly dedicated experiences and personalizations.
You can also combine online customer data with offline customer data. Some DMPs are able to do that to provide a cross-channel capability. You can therefore track a user journey across different channels (physical stores, websites) to increase your conversion rate.
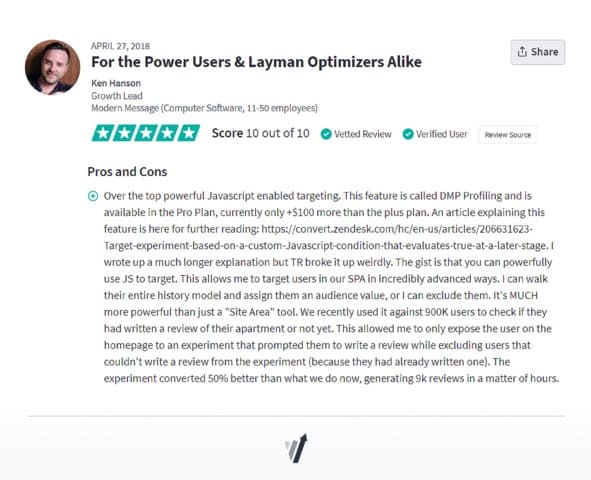
This Convert Experiences user knows all too well what a difference advanced targeting with DMP Profiling makes in testing:
For Consistent User Data Organization
Marketers typically run many different scripts on a website (tag management, A/B testing, analytics, ad tech, product recommendations, etc.) to keep up with the demanding needs of the market. Each of these solutions captures its own user data, which means that, sometimes, the same information is collected multiple times by different sources.
Even though this isn’t a problem by default, it can raise data integrity issues. That’s why it’s recommended to have a central place to keep everything organized. This way you can also avoid being dependent on various platforms that can become legacy. By organizing and managing data consistently, the DMP serves as a central customer data platform where different teams can get reliable answers to their data queries.
How Does Convert Experiences Work with DMPs?
In Convert Experiences, you can onboard your DMP data and use it to segment your experience reports.
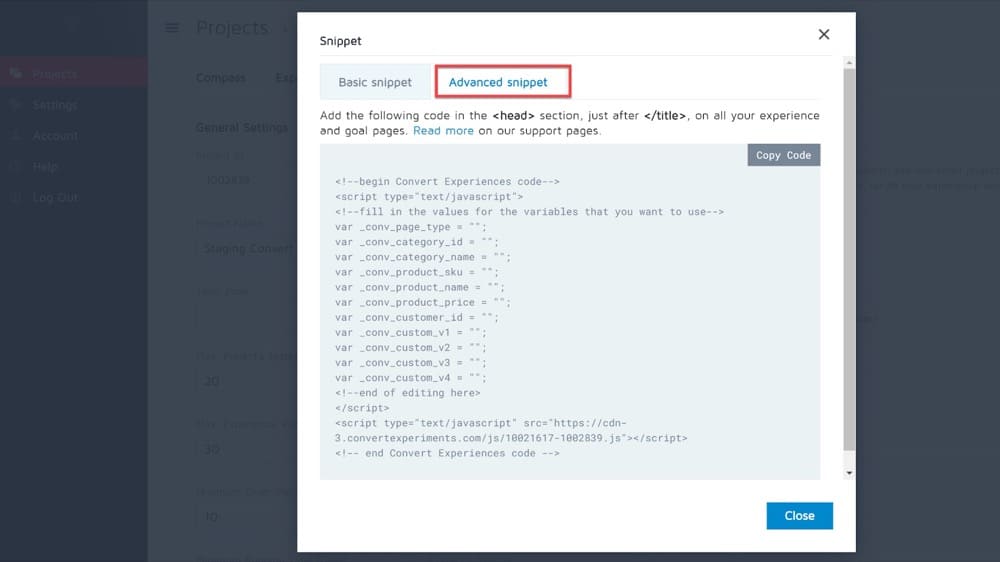
Simply add the Convert advanced snippet to your website and define those extra “Page Tags” as they are used in your DMP:
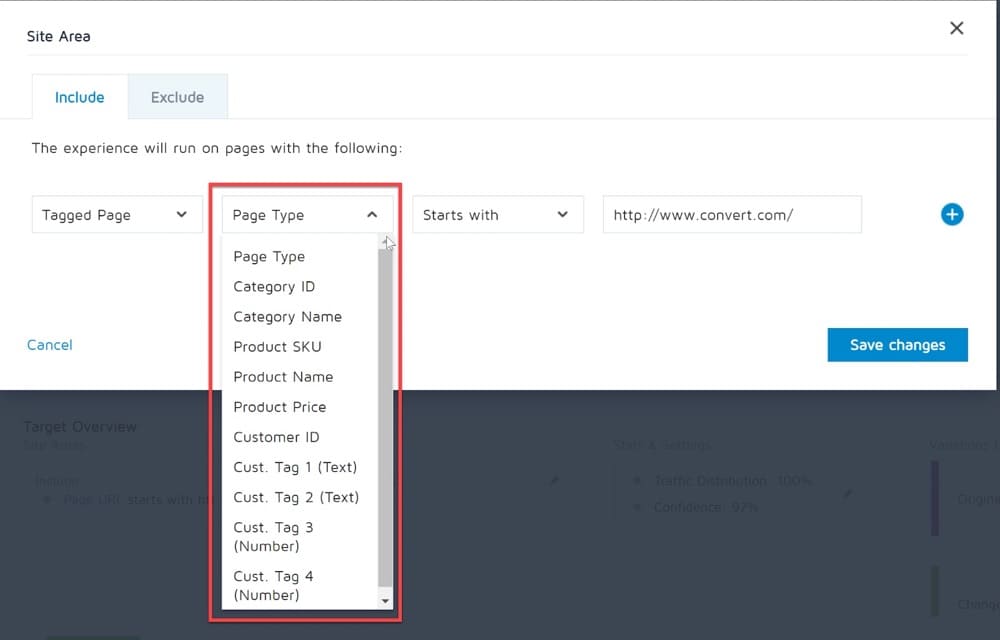
The advanced page tag options can be found in different sections of the app, like the Site Area and on the Audience area, under the advanced Page Tag options.
You will find these tags extremely useful on sites where you want to run a test on a group of pages (e.g. Product pages) but the URLs of the product pages do not follow a consistent pattern that can be used to identify them.
Site Area Custom Tags
Here are all the targeting options related to page content:
- _conv_page_type – Inside this tag, you can place a string of up to 50 characters that identify your page type; for example, it could say “product” or “contact form”;
- _conv_category_id – If you have categories on your website, here you can place the category ID and use that in the targeting options; This is a string of maximum 50 characters;
- _conv_category_name – Same as category ID, only this one is used for category name;
- _conv_product_sku – This is useful for ecommerce websites where you want to target certain SKUs. Place here the product SKU, maximum 50 characters;
- _conv_product_name – Same as product SKU, but used for product names;
- _conv_product_price – This is a numeric tag that you can use to pass by the product price. You then can target based on certain price ranges by saying for example “Product Price greater than 300” AND “Product Price less than 500”.
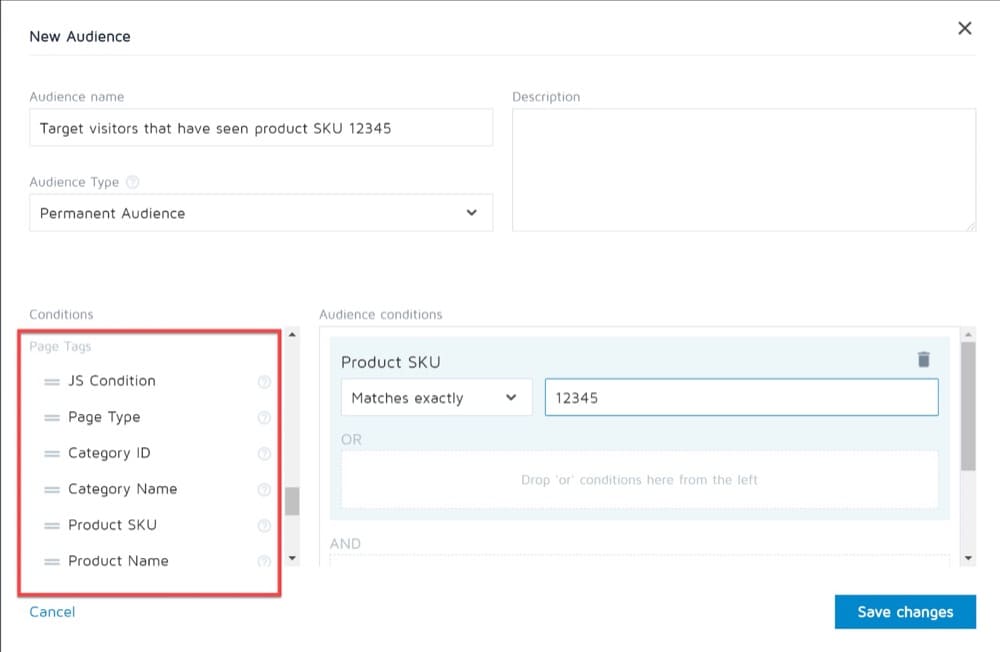
Audience Area Custom Tags
Here, you will find the advance page tagging option related to the visitor, which would be:
- _conv_customer_id – This is a text of maximum 50 characters that you can use to tag your customers. This way, you can test only the visitors that are not customers yet;
- The next 4 variables are used for custom tagging:
- _conv_custom_v1
Text of maximum 50 characters that you can use for custom tags (free fields). - _conv_custom_v2
Text of maximum 50 characters that you can use for custom tags (free fields). - _conv_custom_v3
Maximum 50 characters numbers that you can use for custom tags (free fields). - _conv_custom_v4
Maximum 50 characters numbers that you can use for custom tags (free fields).
- _conv_custom_v1
Order of Custom Tags in Code
Any of the tags above have to be defined on-site, before the main Convert Experiments code.
They need to be defined as standard JavaScript variables, like in the example below:
<script type='text/javascript'>
     var _conv_page_type = 'product';
     var _conv_category_name = 'shoes;leather shoes';
     var _conv_product_price = '150.5';
 </script>

<!----Convert Experiments code follows---->
Conditions that Evaluate True at a Later Stage
Convert Experiences variables are evaluated as soon as the Convert tracking script loads. In practice though, we’ll sometimes be deploying an experience based on values of variables that are defined later on the page. For example, the DMP feature allows it to target lead score/stage from your marketing automation tool (like Marketo, Hubspot, Salesforce, or Pardot) without much effort.
In this scenario, we can use a custom javascript condition targeting rule and an API call to re-check the experiment later.
Inside the JS condition, the following JS API function can be used:
convert_recheck_experiment()
When that code executes, a re-check of the experiment’s conditions is scheduled for 50 ms later, for approximately the next two minutes or until the experiment JS condition check is final (whichever comes first).
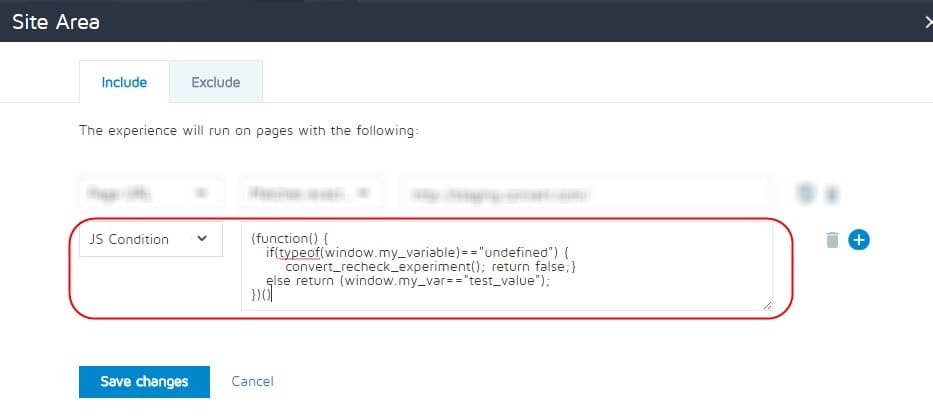
Here is an example:
(function() {
  if(typeof(window.my_variable)=="undefined") {
      convert_recheck_experiment(); return false;}
  else return (window.my_var=="test_value");
})()
In the example above, we check if the variable window.my_variable is defined at the run time.
- If it isn’t, we call the API function to recheck in 50ms.
- If it’s defined, we check its value against test_value and return true or false, depending on whether they match or not. The window.my_variable can be defined later on the page, after the main Convert tracking script, and the experiment will be checked and fired when that variable is defined.
It is important to take into account the possibility that a variable may not be defined at the time the code is first run; if that happens and an error is thrown, the rest of the code will not run.
An example is shown in the code above where we check to see if the variable is undefined so that an error will not be returned and convert_recheck_experiment() will run.
The type of targeting above can be combined with the URL targeting type.
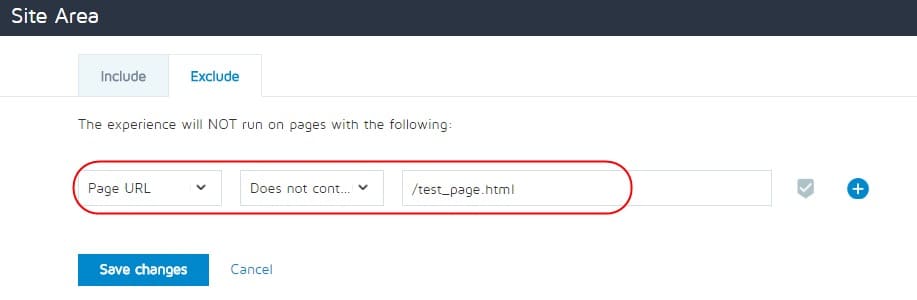
If we wanted to fire an experiment that’s similar to the one above, but only for a page that has the path /test_page.html:
- We would set the condition above into the Include part of the Site Area:

- In the Exclude part of the Site Area, we would add a URL targeting rule like the one below:
URL does not contain /test_page.html.
By doing so, we’d include into the experiment pages where the JS condition is true but exclude all the pages that do not contain /test_page.html into the URL (so just the ones that contain /test_page.html will be included.)
It’s worth mentioning one other common use case: firing the experiment when an element was added to the page (maybe via Ajax); the JS condition would look like the one below:
(function() {
  if(convert.$("element_selector").length==0) {
      convert_recheck_experiment(); return false;}
  else return true;
})()
There are multiple use cases of this functionality limited only by the imagination of whoever uses it.
Some Examples of A/B Tests with DMP
Finally, let’s take a look at a few examples where the DMP feature can be used in your A/B tests.
Example #1: Running an Experiment on Pages that Aren’t Easily Captured by URL Targeting
Convert’s default URL targeting allows you to specify the pages where your experiment should run.
However, you may wish to run an experiment on a group of pages or for a group of visitors that aren’t easily captured by the default targeting functionality.
Here’s what your condition would look like:

Note: When you set custom JavaScript conditions, the URL targeting conditions for the experiment still apply. ALL specified targeting conditions (URL and visitor) must be met in order for the experiment to run.
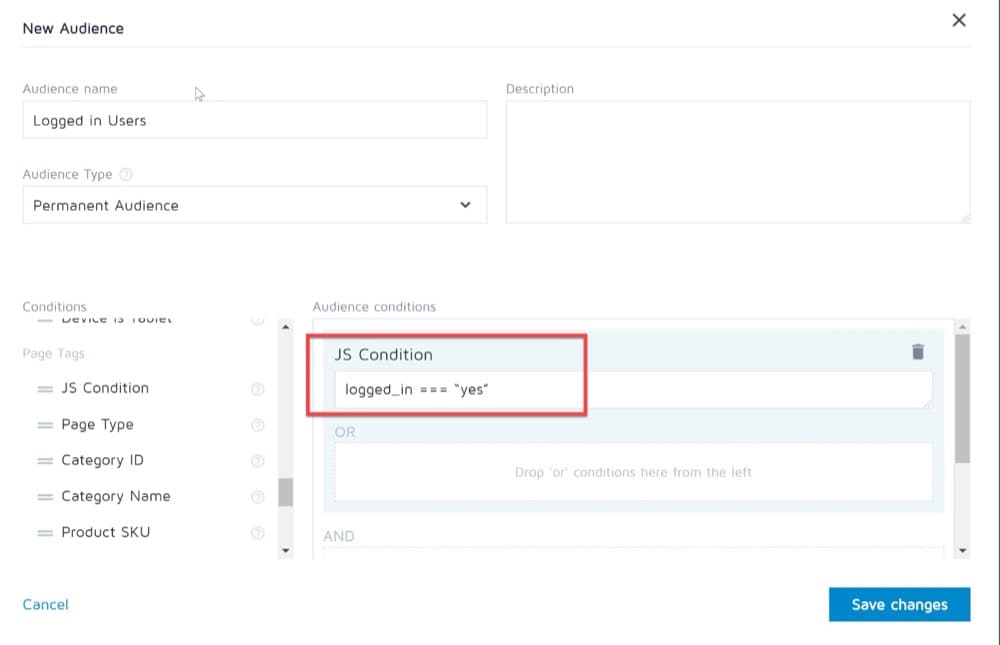
Example #2: Running an Experiment on a Page for Logged-in Visitors only
In this scenario, you might want to run a test on a product page that only targets visitors that are currently logged in.
You know there is a variable on your page called “logged_in” that is either set to “yes” or “no” according to the visitor’s status, but targeting based on cookies does not work.
<script type="text/javascript">
  window.logged_in = “yes”; </script>
<script src="//cdn.optimizely.com/js/XXXXXXX.js"></script>
To set it up, create a JavaScript condition (such as logged_in === “yes”) that will evaluate to true only if the visitor is logged in:
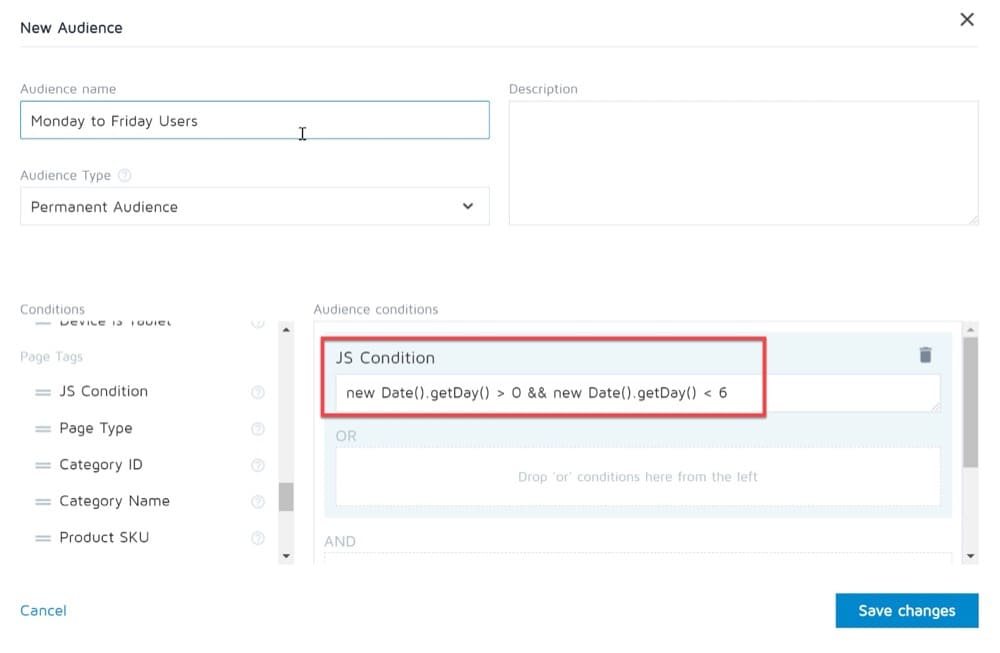
Example #3: Running an Experiment on Certain Days Only
Let’s say you want to test a weekday (Monday – Friday only) promotion on your homepage, but day/time conditions don’t work.
To set up an experiment with these requirements, create a JavaScript condition such as new Date().getDay() > 0 && new Date().getDay() < 6 that will evaluate to true only when the day of the week is Monday – Friday (based on the visitor’s location):
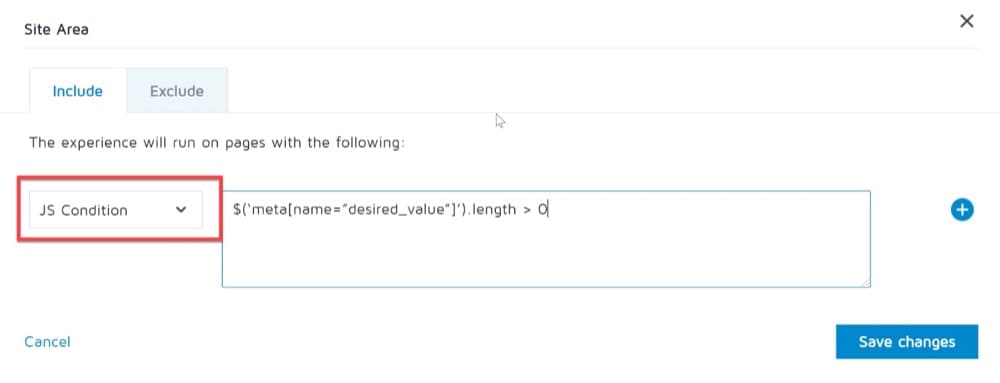
Example #4: Running an Experiment on Pages with Specific Meta-Values
If you want to target customers that visit a page that has a certain meta-value from your DMP, you’ll need to create a JavaScript condition such as $(‘meta[name=”desired_value”]’).length > 0 that will ensure that the experiment only runs on pages with that meta-value:
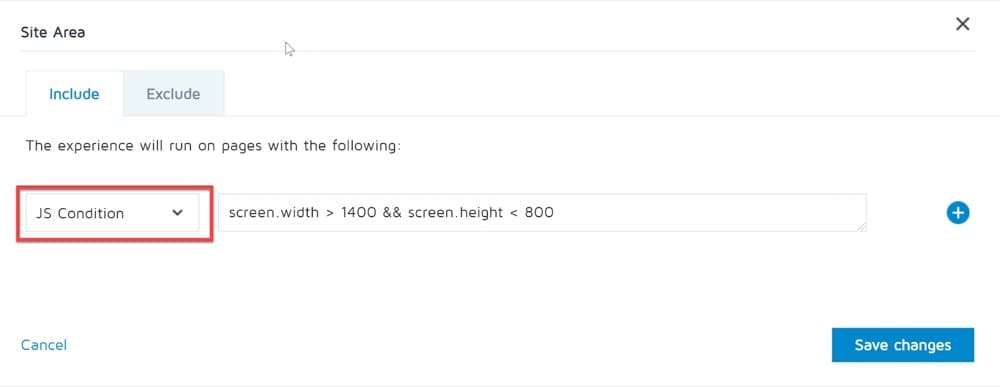
Example #5: Running an Experiment for Visitors with Certain Screen Sizes
Let’s say you have a responsive design site, but want to run an experiment on users who have a particular screen size.
To set up the experiment, create a JavaScript condition such as screen.width > 1400 && screen.height < 800; that ensures that the experiment only runs if the screen width is greater than 1400 and the height is less than 800:
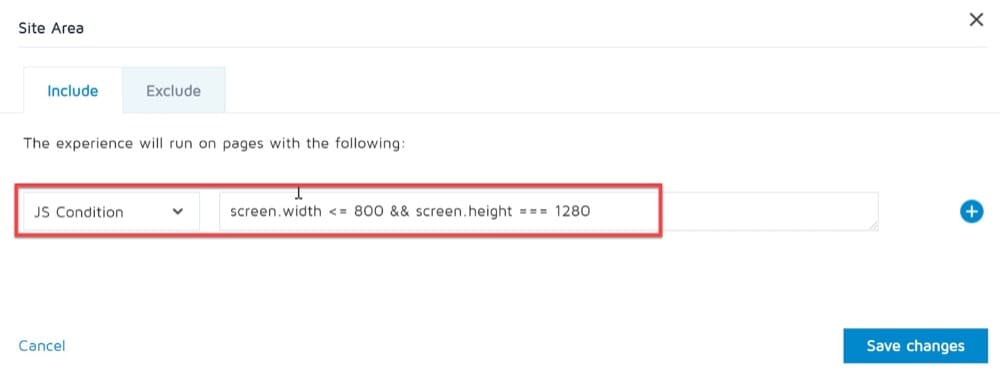
Example #6: Running an Experiment for Visitors Who Aren’t on Mobile Devices
This is another scenario you might find yourself in. Let’s say you want to display an experiment to visitors who are not on mobile devices but setting a condition based on device or browser does not work.
To set this experiment, you’ll need to create a JavaScript condition such as: screen.width <= 800 && screen.height === 1280.
Closing Thoughts
By linking your A/B testing platform with your DMP, you can take your digital marketing campaigns and A/B testing to another level. A DMP gets you access to rich, organized data you can use to build advanced tests. It ultimately allows you to unify your data, customize your messages in a way that is truly personalized, and provide a superior user experience.


Written By
Dionysia Kontotasiou

Edited By
Carmen Apostu