A Beginner’s Guide to AI Automation with n8n
Do you have ideas about what you want to do with AI, but just don’t know where to start? Or you don’t even know what you can do with AI in the first place.
What both scenarios have in common is a lack of understanding of AI’s capabilities beyond the constraints of a chat interface. And what both of those scenarios require is learning to create workflows using small, efficient models.
This guide will show you how to get started with workflow creation. You don’t need to be a developer to follow along, either. We’re going to use a visual workflow creator called n8n.
Why do we need n8n?
If you cast your mind back to our previous tutorials, we had user feedback texts we wanted to analyse.

Specifically, we wanted to extract insight and sentiment pairs from our user feedback. We can do this with a large language model, like (cringe) GPT-5…
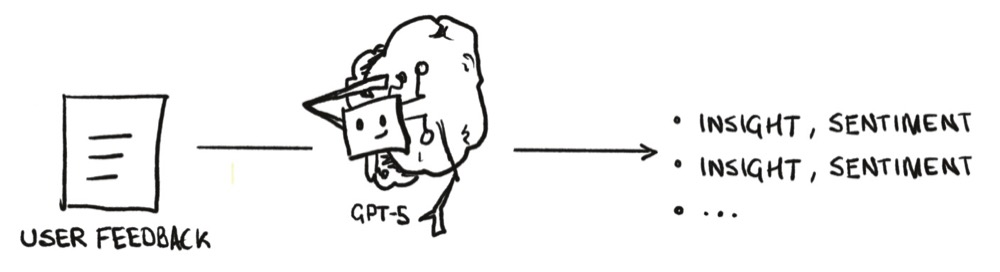
But thankfully, we’ve found a small model efficient enough to run on our local machines.

The compromise we need to make is that we’ll have three interactions instead of one. An interaction for the negative insights, one for the positive insights, and a final one to structure the content.
Three interactions?!? That’s more work, right? Well, let’s fix that by automating the interactions with n8n.
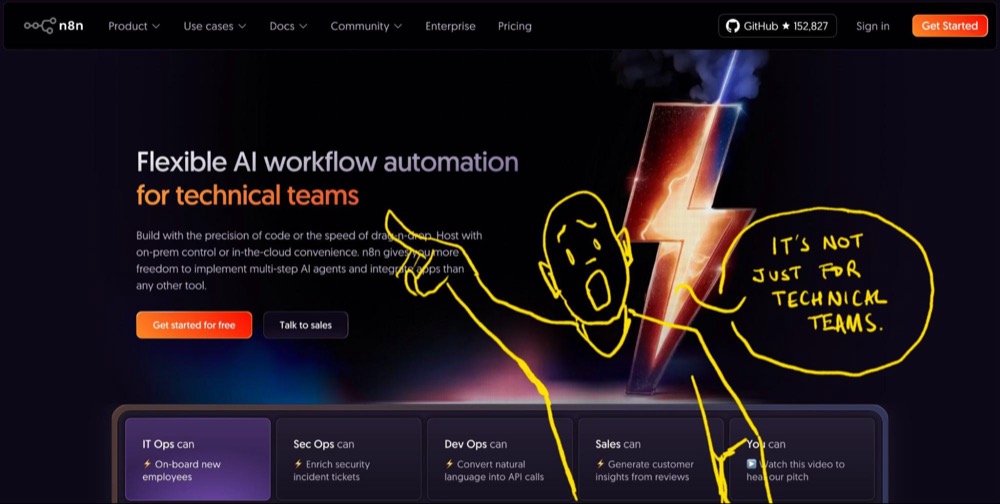
So, head over to this website and take a look, ignoring the messaging that claims it’s for technical teams (it really isn’t).
While we’ll build the workflow in the next tutorial, in this one, we’ll focus on getting familiar with the interface and understanding what n8n can do for us.
Step 1: Install n8n Using Docker
You could create an account at n8n and get started straight away (for a price). But we can install and host it ourselves for free, which is what we’re going to do (especially as we want to connect to our local model).
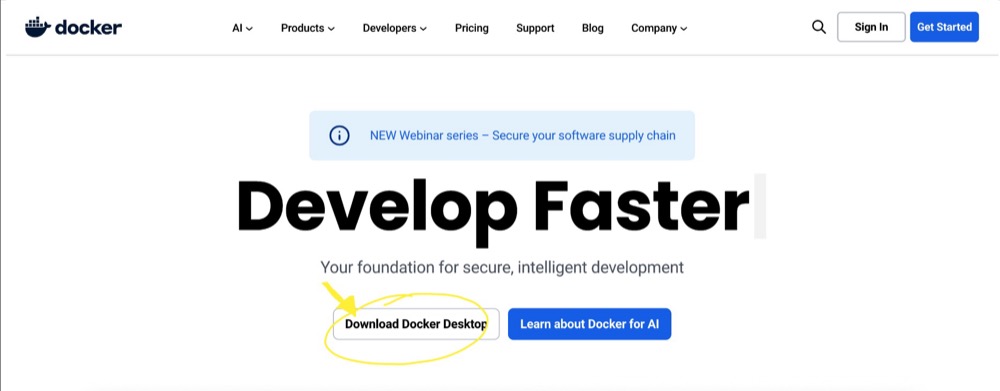
n8n is a web service, which means it’s not like a traditional app you can download and install. Instead, it needs an “environment” to run in. And Docker provides that environment.
We installed Docker in the previous episode of this series the previous episode of this series. In case you missed it, head on over to the Docker website, download, install, and launch it.
Get n8n Running
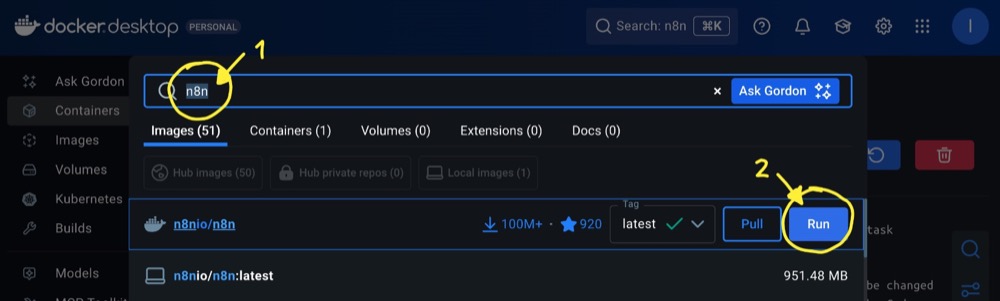
Once Docker is running, search for “n8n” and select the package from n8n.io—it’s the one with 100+ million downloads and a decent star rating—click Run to download the “image”.
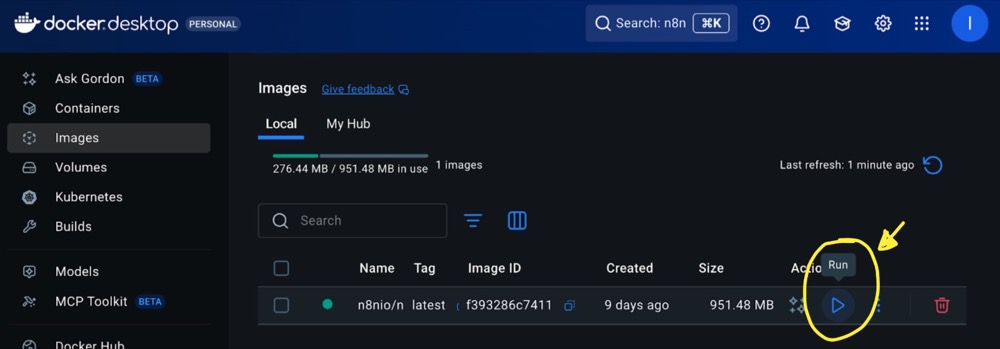
Once you’ve downloaded the image, hit Run again.
Copy the port number (honestly, why is this not defaulted?) and give the container a name. Then hit Run a final time.
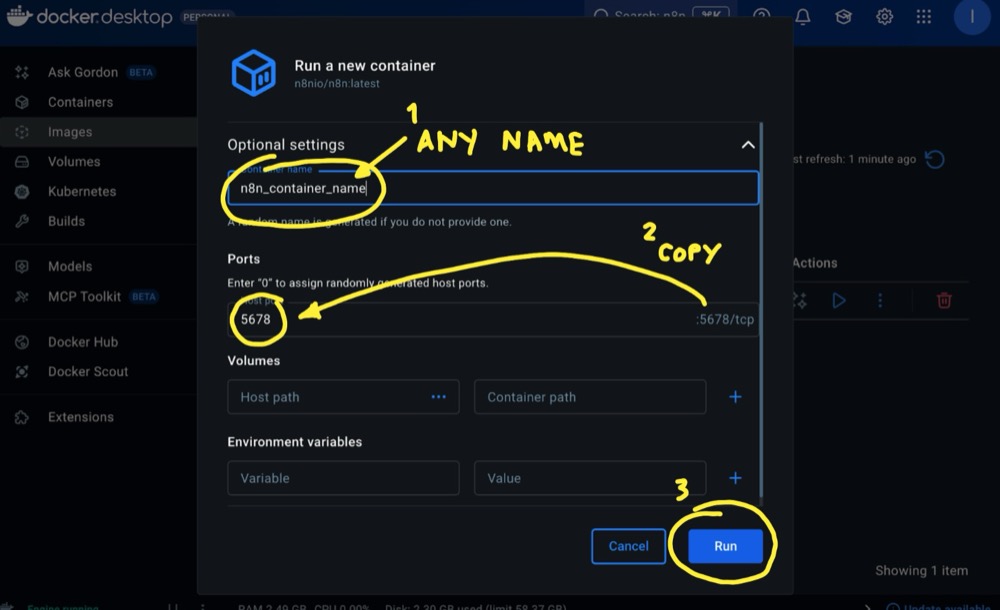
Docker will create your container and provide you with a link that opens n8n in your browser.

Create an account, and you’re ready to go!
Step 2: Understand how n8n works
Before diving in, here’s what you need to know to understand n8n workflows:
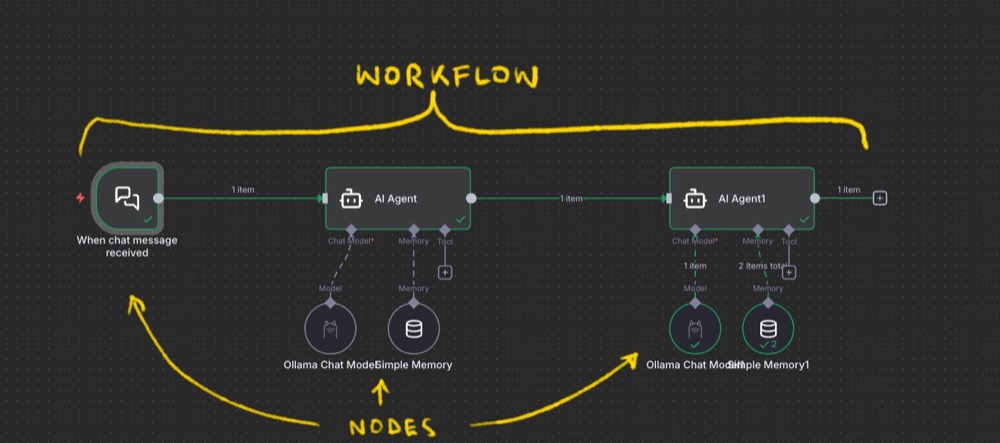
- Nodes: Think of each node as a discrete action to be performed
- Workflows: A series of nodes chained together in sequence
Node Anatomy: Each node has three parts:
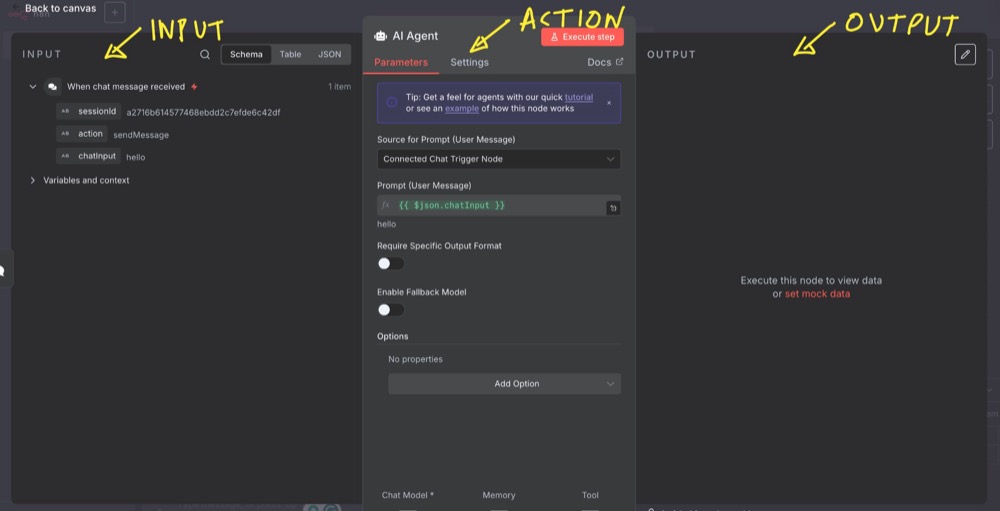
- Input: Data from previous steps
- Action: What the node actually does
- Output: Results that get passed to the next node
Step 3: Build Your First AI Chat Tool
Let’s create a simple chat interface to connect with a local AI model. This will help us understand the basics as we build something useful.
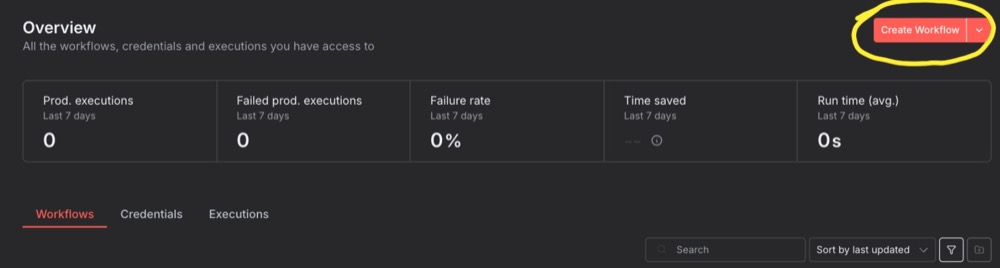
Create a new workflow in n8n.
Then add a Chat Trigger node:
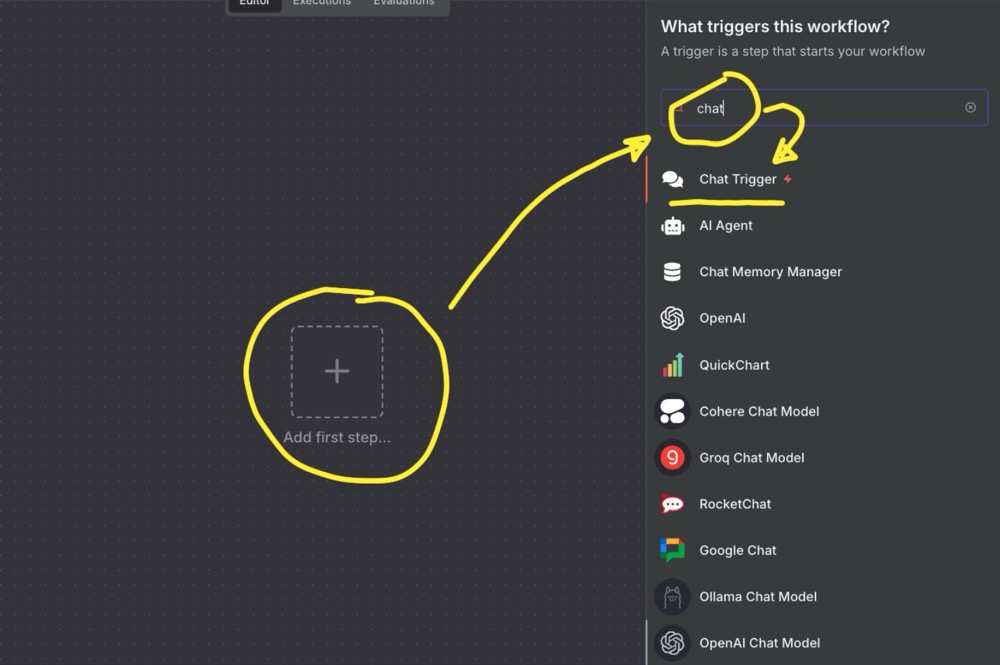
Aside: A chat trigger is a special node that “triggers” the workflow. As such, it will usually not have an input. It just has action and output—no need to edit any configurations for the chat trigger node. Working with n8n is easier when you have some data flowing through.
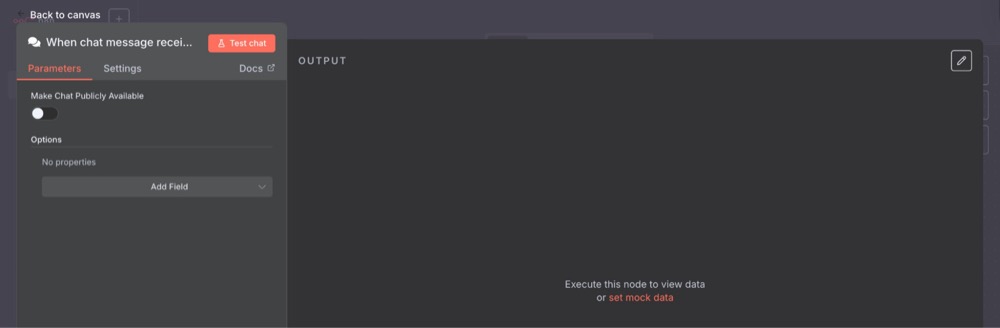
Just click out of the Chat trigger configuration screen, “Open the chat”, then type ‘hello’.
When you send the message, the trigger will go green.
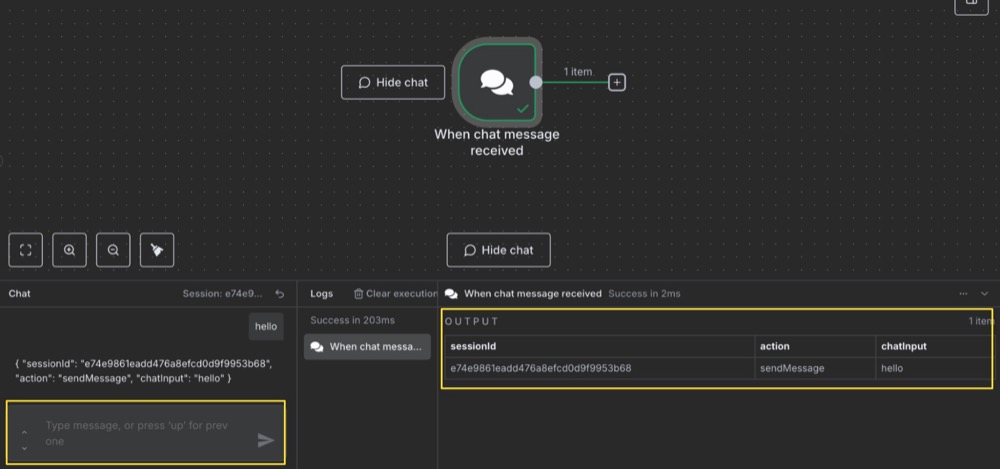
You’ll also see our message appear as an output. This means our data is ready to be used as input in the next steps.
Now, it’s a bit lonely at the moment. We say “hello,” but we don’t have anyone saying “hello” back. Let’s fix that.
Connect Your AI Model
Before proceeding, make sure Ollama is running locally. In your terminal, type:
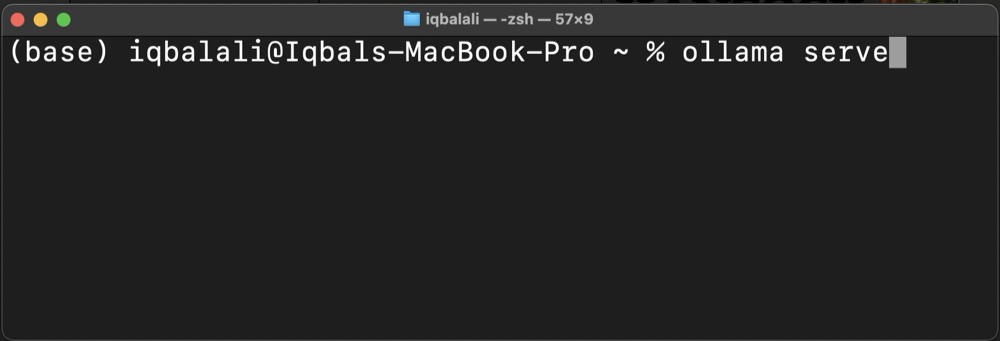
> ollama serve
Make sure the Ollama server is running and there are no errors. Now, go back to n8n, click on the plus to create a new node:
Search “Basic LLM Chain” and select it:

You’ll notice that our “hello” output is available as input:
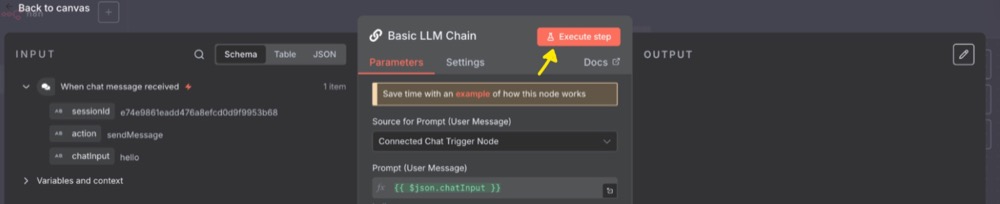
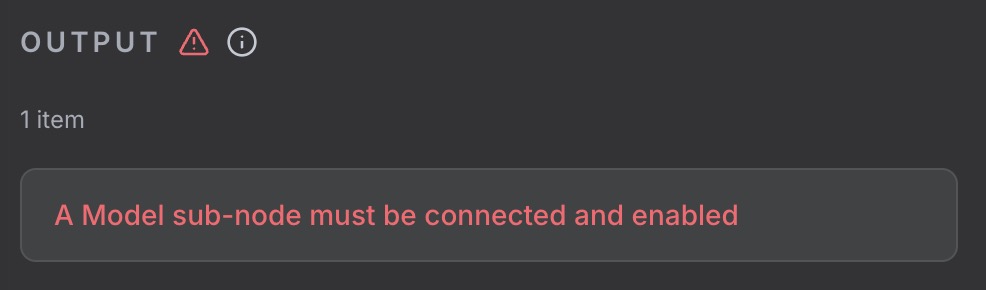
Leave the settings as they are. Hit Execute step and you’ll get an error. We need to add a model subnode.
Click out of the node, add a subnode, and search for Ollama:

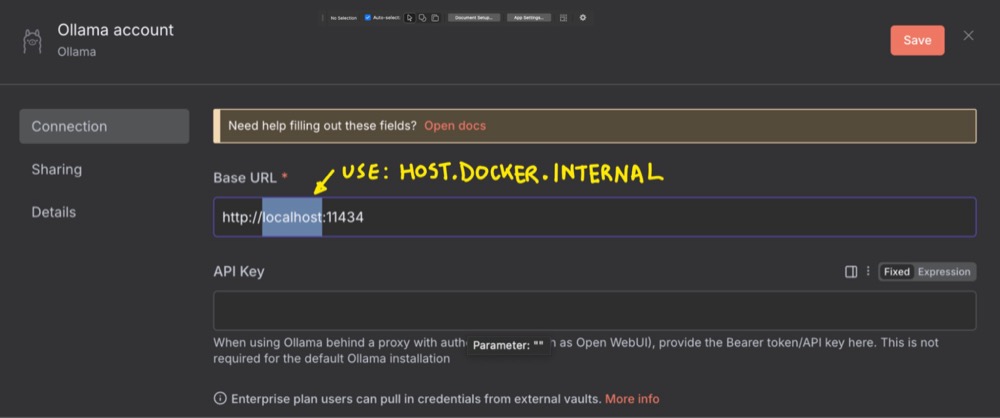
Select the Ollama model and create a new credential:

Then, use host.docker.internal in the web address instead of localhost. In case you’re wondering, host.docker-internal tells n8n to look outside of Docker to our local machine for the Ollama server. You can leave the API Key blank.
When you hit Save, you should get a success message. We can now choose our model. I still like Qwen3.

On the workflow, run Execute the node using the “play” button:

That output is our very own local model saying “hi” back!
Step 4: Customise Your Workflow
Right now, the entire content of our chat message serves as the sole prompt for our SLM. This means we have to enter our prompt along with the user feedback text every time. But it doesn’t have to be that way.
We can add a custom prompt to the Basic LLM Chain node. This way, we can send only the user feedback text as the message, making things slightly easier for us.
To do this, (1) change Source for Prompt to Define below, (2) select Expression, then (3) select the “expand” icon, so we have a larger editor space:
Once done, we can write our prompt in the Expression box, dragging the chatInput into it as the dynamic part. The Result shows an example of what the final prompt to the LLM (or SLM) will look like:

Now we can enter just the user feedback as our message, making things a little easier for us.

What’s next?
Through building this basic chat tool, we learnt the foundation for understanding how AI workflows operate.
The real power comes when you start chaining multiple AI operations together, connecting different services, and automating complex processes that would otherwise require manual work.
In the following episode, we’ll build a workflow to replace our three-step interaction with the SLM.
Editor’s note: This guide is part of a broader series on building practical AI systems. To continue from here, explore our guides on building your first AI agent, connecting Google Sheets to n8n, building RAG workflows with n8n and Qdrant, extracting themes from user feedback with n8n, quantifying those feedback themes, and connecting chat interfaces to other tools.

Written By
Iqbal Ali
Edited By
Carmen Apostu