Exploring Convert MCP with Small Models: How to Run A/B Tests Through Claude Code and Qwen 3
Part of the Small Models series: This article explores one way to interact with the Convert MCP server. It’s an advanced use case for those who want to experiment with small, cost-efficient, and secure models and alternative tooling.
Let’s do something cool with Model Context Protocol (MCP) today.
If you have Convert account, imagine being able to access, manage or even create experiments, all without touching the user interface. You’d do all this from the comfort of a chat interface, using Claude Code and Convert’s MCP server.
This is perhaps the most fun aspect of MCPs: getting AI to work for you as an assistant!
Let’s see how. I’ll be focusing on small models again, but benchmarking against large models too, so we can see what the difference is and make sure that we’re not missing out on any performance.
The Stack
First, the main tool: Convert’s MCP. I’ll show you how and where to set it up.
The second is Claude Code. We’ve been using LM Studio up until now, but it’s time to move to something with a bit more “Agentic” niceness. The Agentic nature of Claude Code means that it’s able to try an action, catch the errors, and then research the documentation before trying again.
This loop works especially well when paired with a small model, so we’re working in a sustainable way.
About this Guide
Think of this guide as a demo. You’re welcome to follow along, but treat it more like an inspiration in terms of what is possible with MCPs. It’s slightly more developer-centric than usual, but don’t worry, I’ll explain things clearly as we go.
But just make sure you’ve watched my previous videos or read my previous articles, at least the MCP intro and the OpenRouter guide.
Setting up Claude Code
Claude Code is a terminal-based application. You can either download it from their site or install it via the terminal commands in the documentation. Either way works.

Once it’s installed, pick a folder to work in. This is important because Claude Code is constrained to that folder. It’s not going to go wandering around your system. Open your terminal, change directory to that folder, and type claude to start it up.
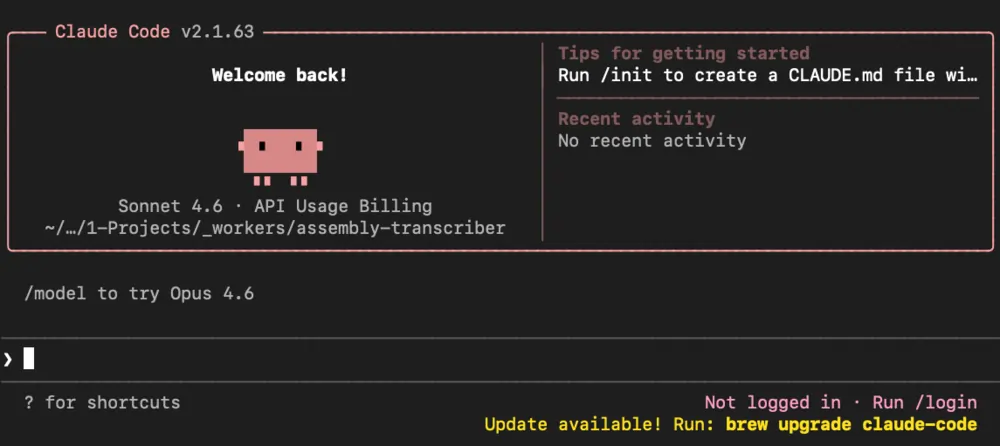
Now, normally, you’d log into your Anthropic account at this point. I’m not going to do that, and I wouldn’t recommend it for what we’re doing here, because we’re going to be using small models instead.
Installing Claudish
To use small models with Claude Code, you need to install an additional app: Claudish.
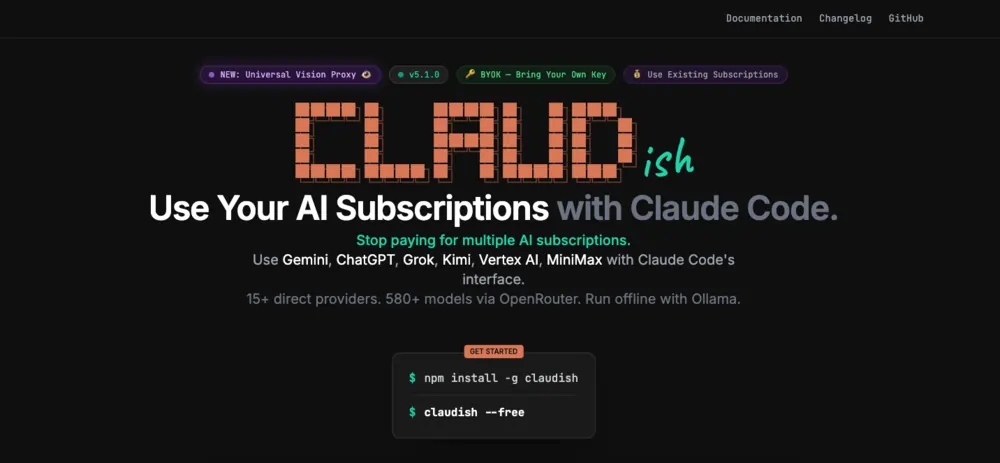
Claudish is a lightweight tool that lets you use Claude Code with any model available on OpenRouter, instead of being locked into Anthropic’s own models. You can even use local models with Claudish if that’s your thing.
Install it with:
npm install -g claudish
Then head over to OpenRouter, create an API key, and set it as an environment variable so everything on your system can access it.
On Mac:
export OPENAI_API_KEY=your_key_here
On Windows:
setx OPENROUTER_API_KEY "your_key_here"
Restart your machine after doing this, just to make sure the environment variable is properly loaded. It’s the easiest way to avoid weird issues later.
Getting the Convert MCP Config
The MCP server config for Convert is available here. The following is the part of the config you need:
{
  "mcpServers": {
    "convert": {
      "command": "npx",
      "args": ["-y", "@convertcom/mcp-server@latest"],
      "env": {
        "CONVERT_API_KEY": "your_application_id",
        "CONVERT_API_SECRET": "your_secret_key",
        "TOOLS_FOR_CLIENT": "reporting"
      }
    }
  }
}
Fill in your actual key and secret.
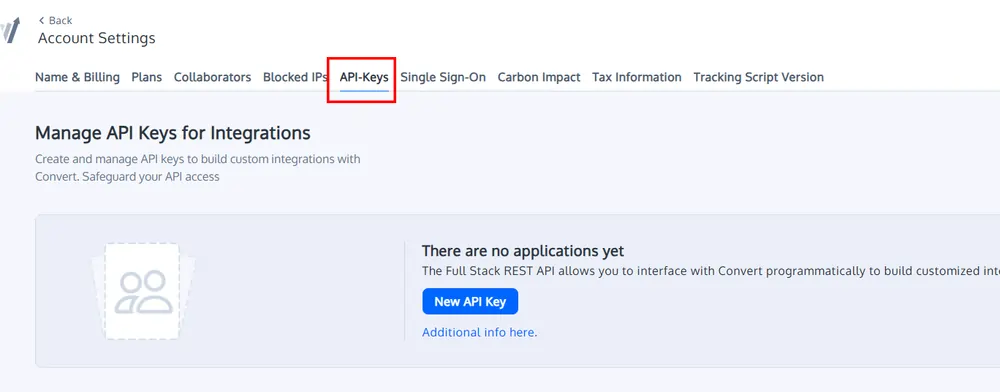
Head into your Convert account, go to Account Settings, find API keys, and grab your key and secret. When setting up the config, you’ll also need to decide what tools to allow. The options are reporting, read_only, or all. I’m setting it to all because I want to be able to create and manage experiments, not just read them.
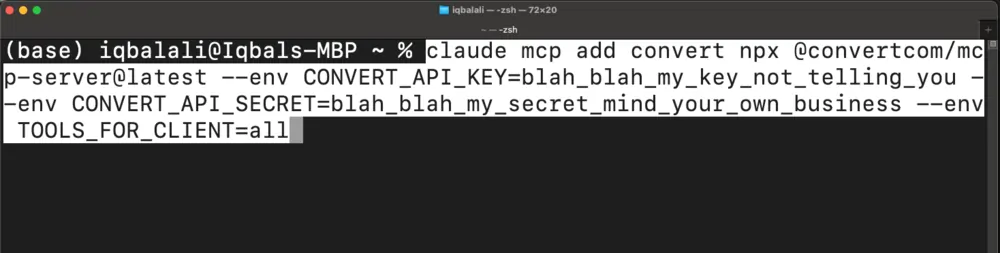
To add the MCP server, you can either edit the MCP config file directly and use the snippet you’ve already collected (Claude Code docs cover this approach well) or you can use this terminal command to push an addition instead:
claude mcp add convert npx @convertcom/mcp-server@latest --env CONVERT_API_KEY=blah_blah_my_key_not_telling_you --env CONVERT_API_SECRET=blah_blah_my_secret_mind_your_own_business --env TOOLS_FOR_CLIENT=all
I like this approach as it protects against syntax issues in the JSON.
Once that’s done, you’re ready to go.
Picking a Model and Getting Started
To start Claudish with a specific model, type claudish followed by the model flag. I’m using Qwen3 Coder Next from OpenRouter. Copy the model ID from the OpenRouter models page, drop it into the command, and you’re in.

claudish --model qwen/qwen3-coder-next
The first thing I tried was getting a list of projects.
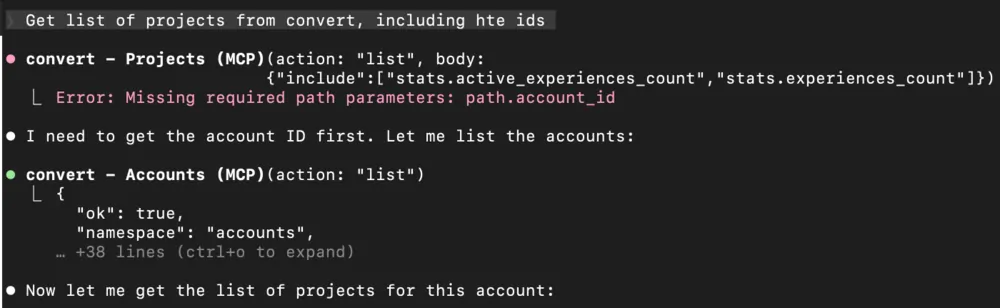
Prompt: Get list of projects from convert, including the ids
The result:

Neat. Claude Code knew to use the MCP tools to fetch the information I wanted. What’s great is watching it handle errors. It saw a missing parameter, corrected itself after getting the feedback, fetched the account ID, made another call, and got back the list of experiences. No intervention needed from me.
From there, I listed experiments for a specific project ID.
Prompt: Get list of experiences for project
The result:
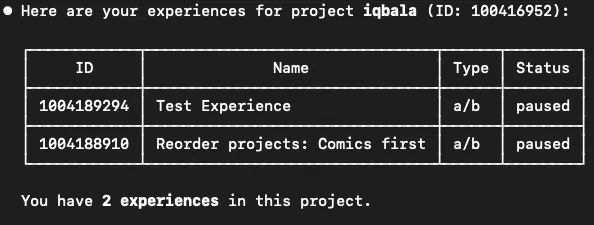
I’ve only got two experiments set up in there, both paused. Asked it to archive both.
Prompt: Archive both these experiences
And then said:
Prompt: List experiences
The result:
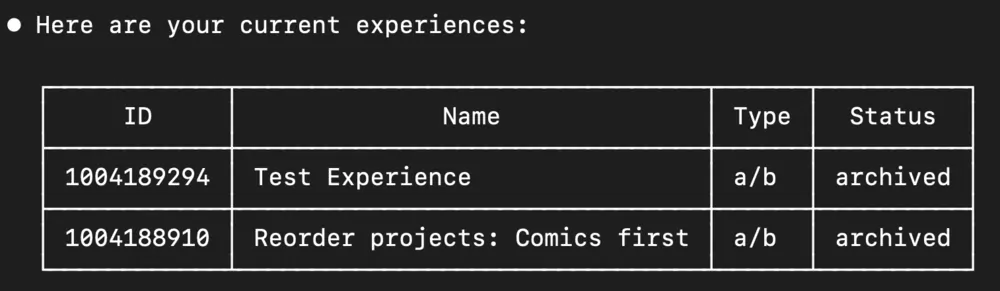
Both experiences were archived. We can see the API calls that the MCP tool generates, and if we hit Ctrl+O, we can see the full response from the server. This is handy for debugging.

We can also see how the “Agentic” nature of Claude Code allows it to react to errors. For instance, we didn’t supply an account_id which it needed. Claude can figure out that it needs to make another API call to get the account_id:
This is useful to see how efficient (or inefficient) we and the tool are at communicating.
At the bottom of the screen, Claudish shows the total cost:

So, that’s $0.07 for doing these tasks. And a small model handled all the tasks fine. In fact, we may be able to get away with even smaller and cheaper models, but I’ll let you explore that.
For now, let’s do something a little more advanced.
Pushing It Further: Creating an Experiment from Scratch
This is where it gets interesting. I put together a more detailed prompt with some context: a bit about my site, iqbala.com, a note that Convert has an MCP server, and the relevant account and project IDs so it didn’t have to go hunting for them.
Here’s my full prompt:
Prompt:
%CONTEXT%
I have a website at https://iqbala.com. I am using a third-party testing tool called Convert. The tool allows me to create javascript to run client-side, and apply changes to the DOM.
Convert has an MCP server to use their API. This is available as a tool for you to use to create and update experiences and variations.
My account_id = 100414230
My project_id = 100416952
%TASK%
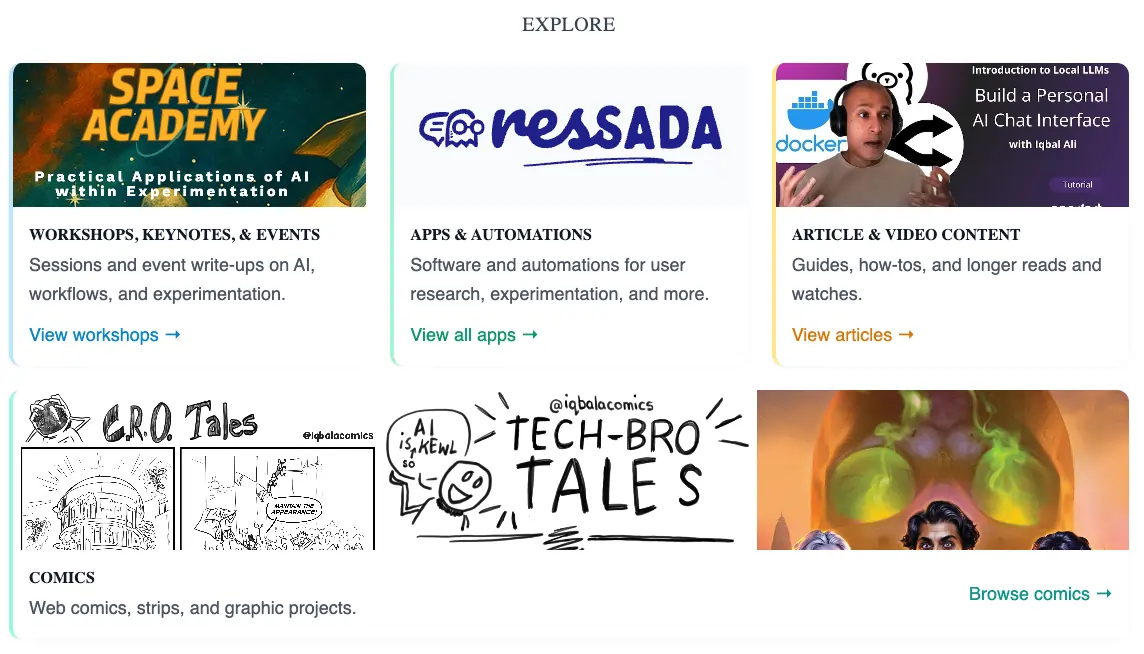
On my homepage, https://iqbala.com. Page has a projects-grid section. change the order of the projects inside. the comics card should come first.
- Go to https://iqbala.com, research the HTML for that page
- Give me javascript I can add to the page to apply the change
- Then create a new experience in Convert applying the change as a variation as part of an A/B test
The task: go to my homepage, look at the project grid where a Comics panel is last, and create a Convert experience that moves it to first position. The steps were: fetch the page, research the HTML, write the JavaScript to apply the change, and then create a new experience in Convert using that JavaScript.
It went back and forth quite a bit. Fetched the HTML from the site. Generated the JavaScript. Made several attempts to call the Convert MCP server, hit a few errors, iterated on them, and eventually got there. Cost: $0.042.
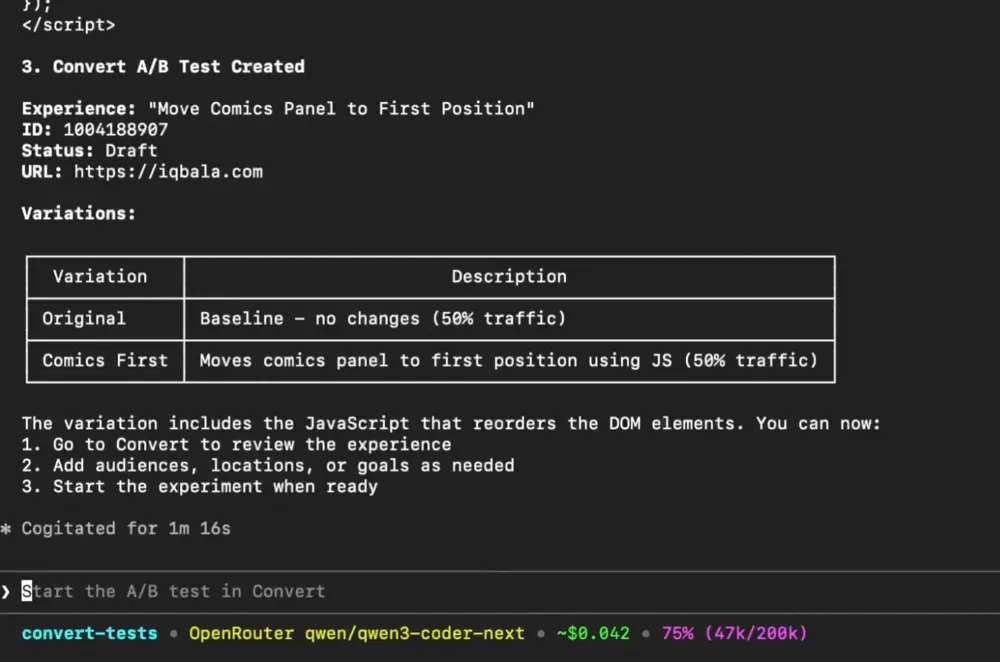
I went into the Convert dashboard to check. The experience was there. The JavaScript was in the variation. So it did what it was supposed to do. When I QA’d it though, the element had moved outside of the project’s grid, so the JavaScript needed some tweaking.
The experiment worked as a concept, but the output needed iteration. That’s normal.
Small Model vs Large Model: What’s the Difference?
I know what you’re thinking. Would Claude Sonnet just do this better?
So I ran a few tests with the default Claude Code model, Claude Sonnet 4.6, to find out.
Performance was roughly the same. Both models produced inconsistent JavaScript quality across runs, meaning sometimes the output was cleaner than others. Neither one had a clear edge in terms of getting the task right the first time.
The difference was the cost.

One run with Claude Sonnet came to $2.11. Others were closer to $3. The average was around $2.50 for this task. Compare that to $0.04 with Qwen. This is not a small gap. That’s a 60x price difference, roughly, for the same output quality.
Note: I only ran Sonnet four times because it was getting expensive fast. I ran Qwen3 at least six times before I was satisfied with the cost and output.
This is all great, but the big question is…
Would I Roll This Out Across a Team?
Probably not yet. And here’s why.
The biggest concern I saw across multiple runs is that both models, the small one and the large one, occasionally decided to make an experiment active without being explicitly asked.
That’s the kind of thing that can cause real problems in a production environment, especially if the person running the prompts isn’t experienced or attentive enough to catch it.
The second issue is inefficiency. Every time you prompt, you learn the right way to complete a specific task. You can then tighten things up to make fewer API calls. But if you’re rolling it out across a team with varying levels of prompting skill, that inefficiency scales with the organisation. That’s a headache nobody needs.
What this is good for right now is singular use by someone who knows what they’re doing, with short, specific prompts and tight back-and-forth interactions, like the first half of this demo. For that use case, I think it could be useful, especially with the cost savings with small models.
But there’s a lot of promise here. What I want to build next is a workflow using MCPs and n8n that creates a proper AI system, something actually suitable for teams to use. Something with guardrails, consistency, and reliability built in.
But that’s the next video. See you there.
Editor’s note: This guide is part of a broader series on building practical AI systems. If you’re just getting started, we’d recommend our guides on getting started with AI automation in n8n, building your first AI agent, connecting Google Sheets to n8n, building RAG workflows with n8n and Qdrant, extracting themes from user feedback with n8n, quantifying themes with n8n, connecting chat interfaces to other tools using MCP, and setting up MCP servers in n8n.
Written By
Iqbal Ali
Edited By
Carmen Apostu