N8N and Qdrant Vector Store: A Tutorial on Retrieval-Augmented Generation
How do you create effective workflows that deal with large volumes of user text data? Like, say you want an LLM to analyse large volumes of user feedback for insights as a workflow.
In this instance, what you need to learn is a process called Retrieval Augmented Generation (RAG).
The problem that RAG solves
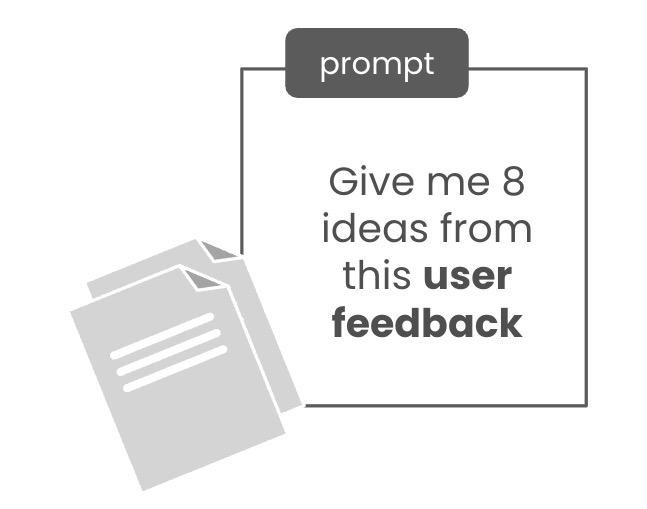
A typical approach to prompting with LLMs is to throw user feedback into a chat interface, along with your prompt, like this:
On the face of it, this should scale well, especially as models like Gemini claim to be able to handle the equivalent of all seven Harry Potter books.
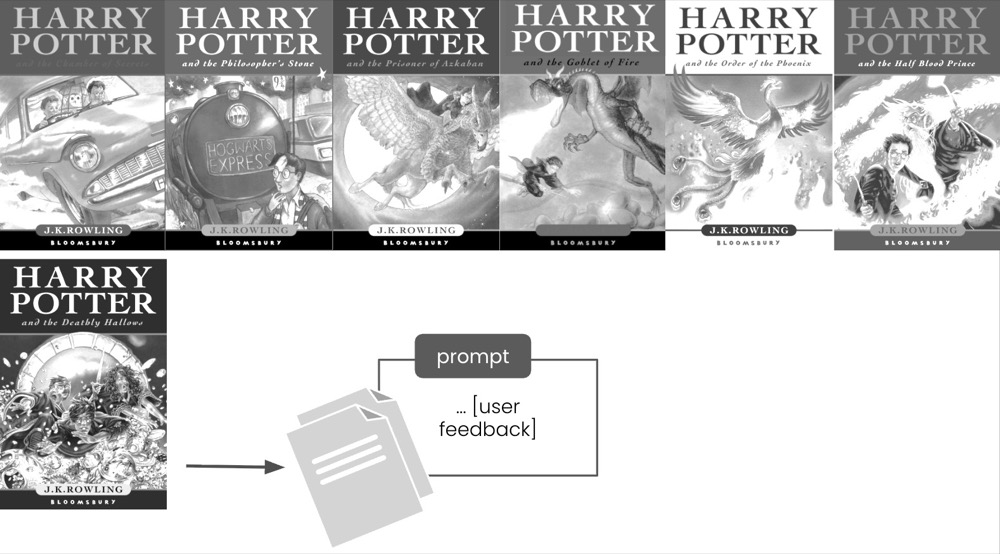
But the truth is a little more complicated because, in real-world practical usage, Gemini is optimal for only three pages. That’s a heck of a difference, right?

One way to fix this problem is to send only relevant data to the LM for processing. Wouldn’t it be nice to retrieve relevant text that matches some search criteria? Not strict, like a traditional database, but a database that is able to handle semantic similarities.
Vector storage databases
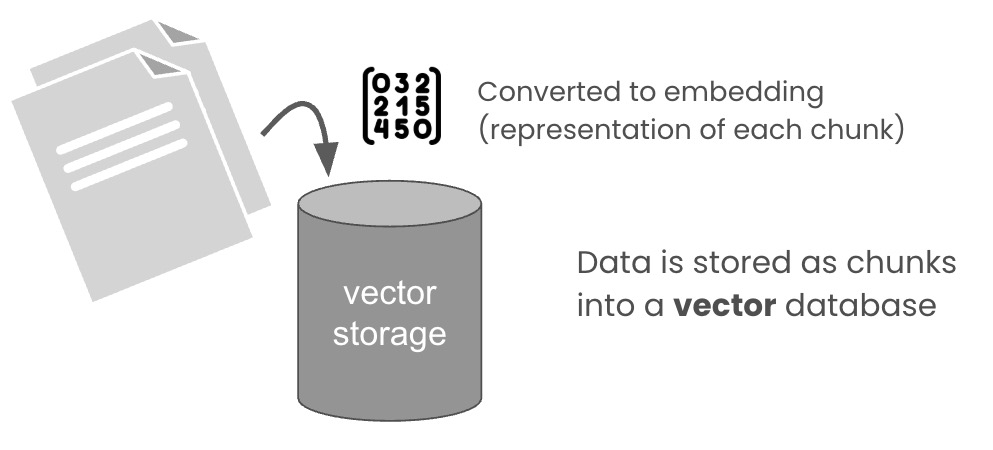
This is where a vector storage database comes in. You have your texts (or documents), and all that gets broken into chunks. Then those chunks are converted into embeddings, which is like a numerical representation of that text. These are then stored in a database you can search using natural language.
Once these text chunks are stored, you can then search using natural language:

For example, you might search for text matching “checkout or payment-related feedback”, and you would get returned something like this:
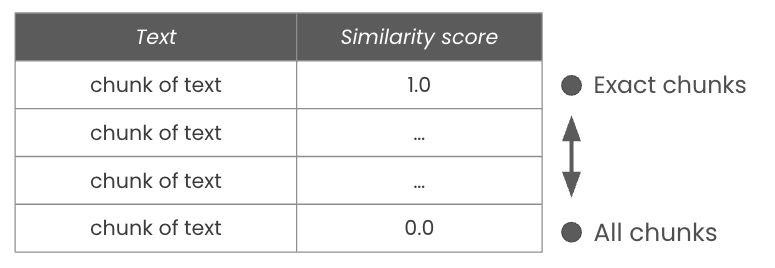
Searching for that text will retrieve the text chunks, along with a “similarity score” stating how closely each text matches the search term. A score of 1.0 is a direct match, while 0.0 will return everything.
Having access to a tool like this improves our ability to work with large volumes of text efficiently. So, how do we do this?
Step 1: Install required components
There are two things we need to install. Looking at our diagram again, the following is what we need.
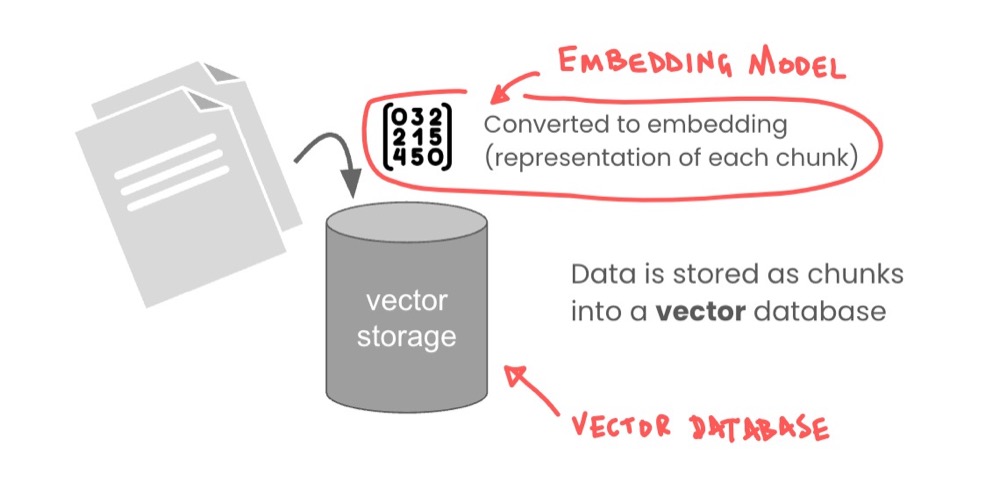
We need an embedding model to convert our text to numbers, and we need a vector storage database. Let’s start with the vector storage database.
Install the embedding model
As mentioned, embedding is a special kind of model that will convert text to lists of numbers. The numbers represent text relationships and can be quite deep. This depth is represented as “dimensions”.
The model we’ll use is the Qwen3 embedding model. We’ve been using Qwen3 for the other stuff, so why not? We can install the embedding model into our Ollama instance.
Just head over to ollama.com and search for “qwen3 embedding”:
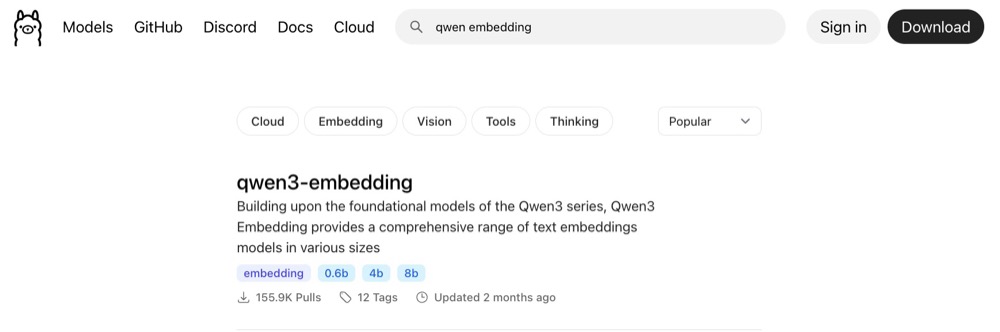
The one we’re interested in is the 0.6b variant. It’s small enough for our job. Click on “0.6b” and copy the name to use in Ollama.
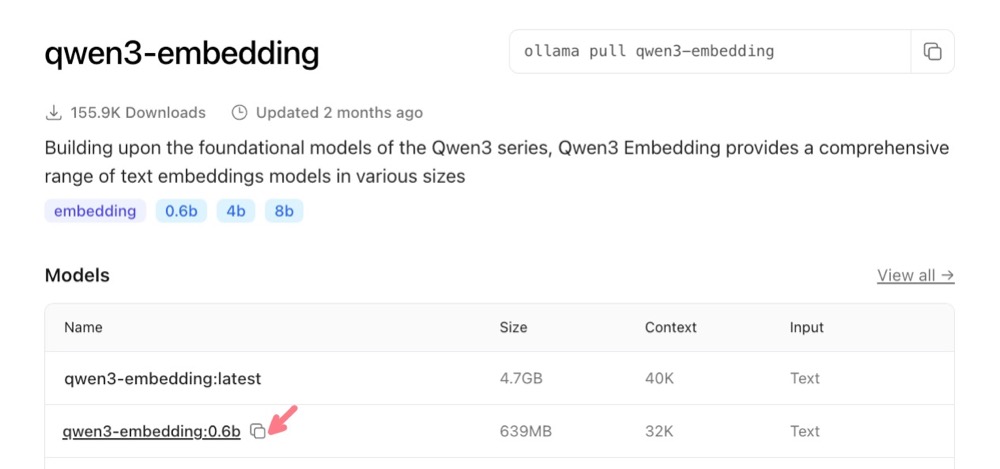
Now, before we go ahead and pull this model, let’s find out a bit more about it. Scroll down and we see that it states that the embedding dimensions supported are up to 4096 dimensions.
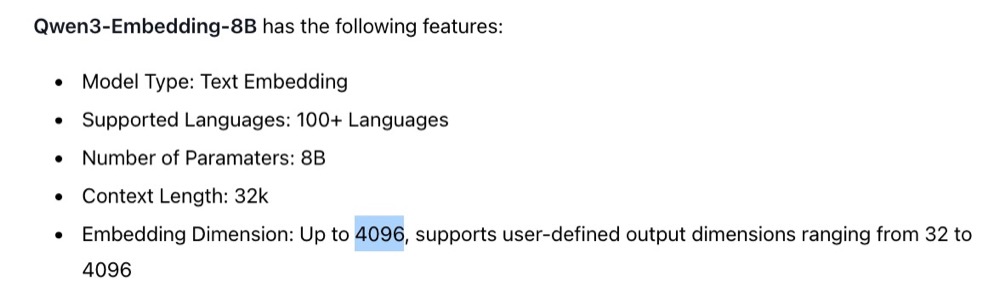
This is wrong, as it is for the 8B version of the model. So, here’s a quick tip for you: always check the model details in Hugging Face. So, head to huggingface.co and search for “Qwen3 embedding 0.6b” to get the model-specific details.
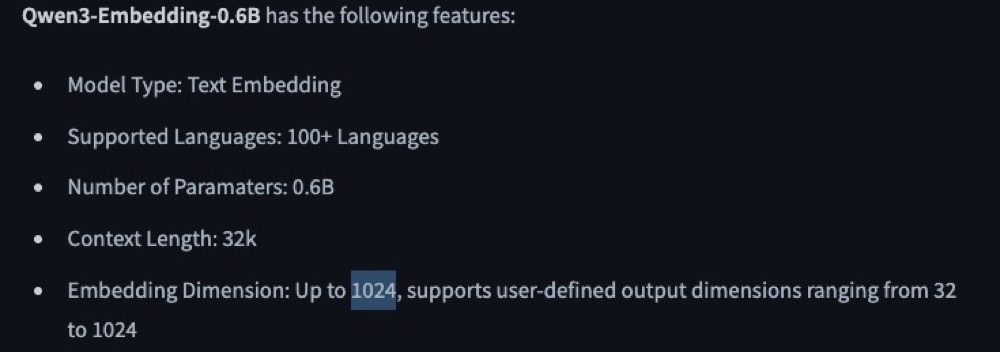
The Qwen3 0.6b model actually supports up to 1024 dimensions. This will be useful for us later as we do our setup. But just know that Hugging Face tends to be more reliable for this sort of information, from my experience.
Now, let’s pull this model into our Ollama server. Open the terminal or command line and type:
ollama pull [pasted name]
So, for my example, it’s:
ollama pull qwen3-embedding:0.6b

And that’s it! Our model is pulled and ready to use. Let’s now install our Qdrant vector store.
Install Qdrant Vector Store
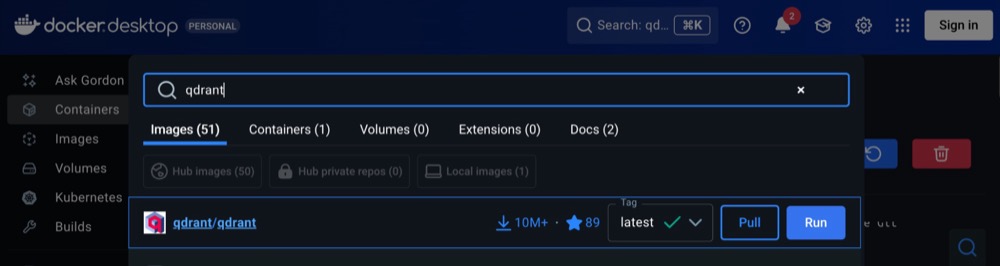
There are a number of vector storage options out there. I’m qoing to use one called Qdrant just because I’m more familiar with that one. We install Qdrant using Docker.
In your Docker Studio, search for “qdrant” and install the one with the highest rating and downloads (this should appear at the top).
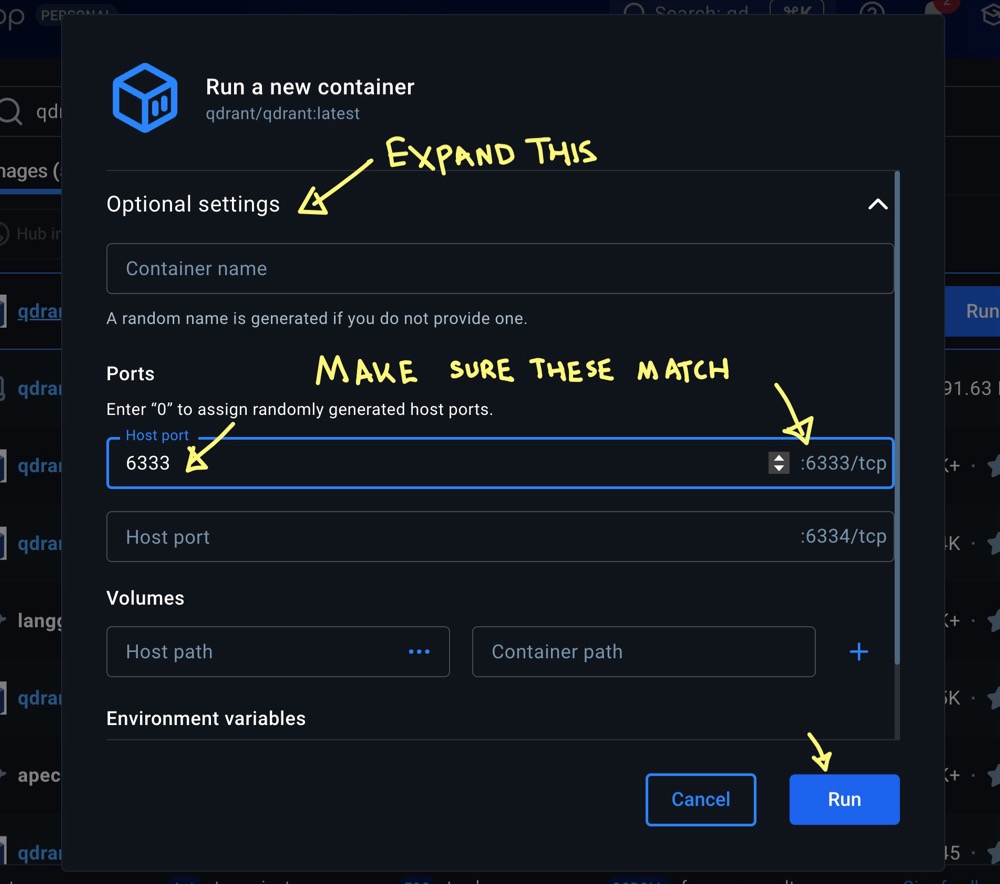
When you hit Run, in the pop-up, select “Optional settings” and make sure the port numbers match. You’ll need to copy the number from the right and paste it into the “host port” field. You can optionally give the container a name. Then hit Run again.
Once docker does its magic, it’ll give you an address to access the web UI.
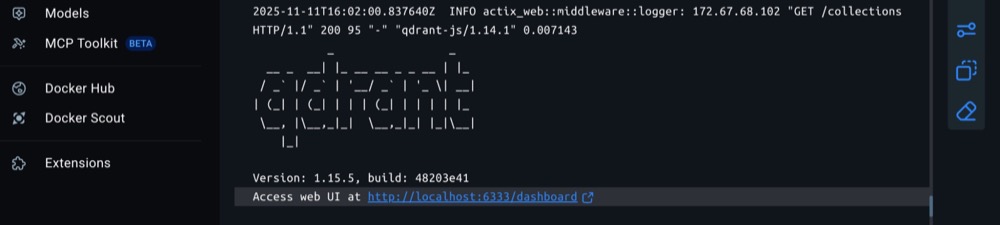
This should be http://localhost:6333/dashboard. Clicking the link will open the dashboard. Qdrant allows us to create multiple databases (or “collections”). We need to create a collection that is set up for embedding model.
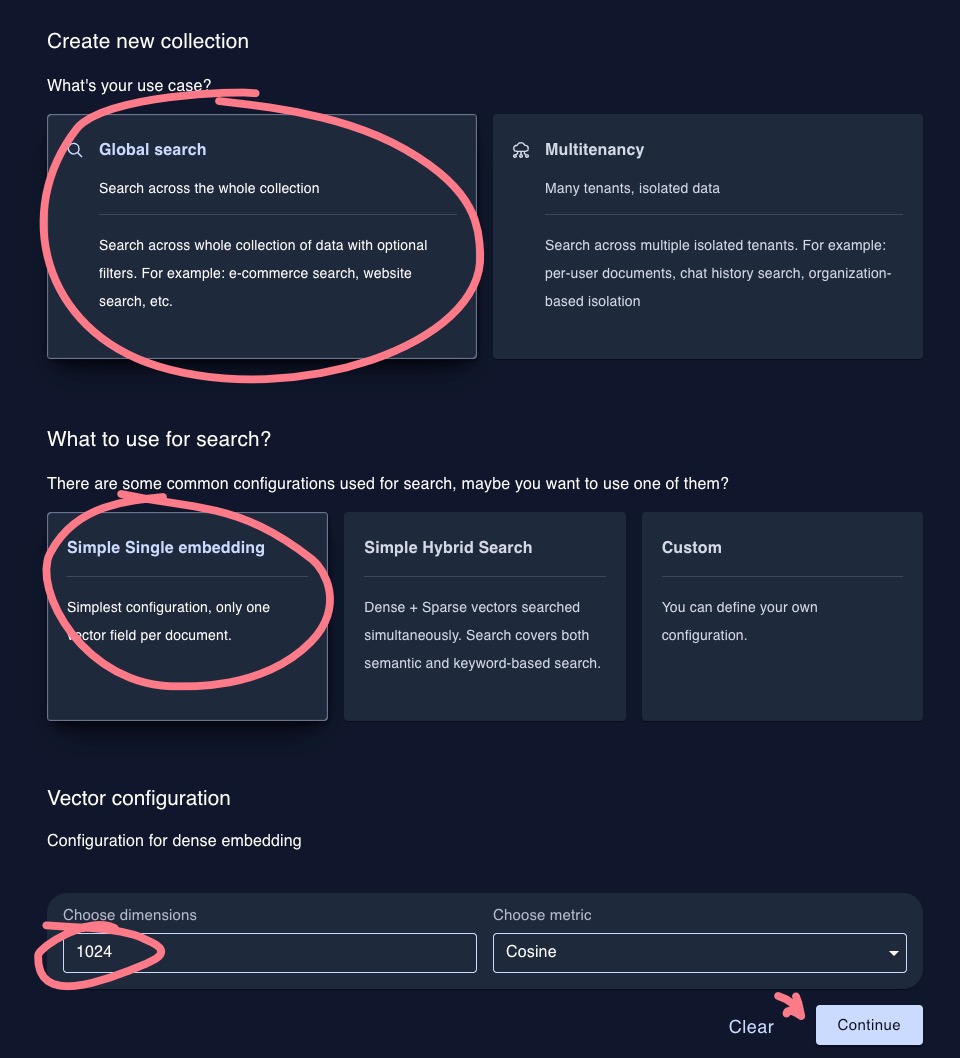
Click “Create collection”, then give it a simple name. I don’t use spaces, just a habit of mine. So, perhaps pick a name and use dashes instead of spaces. Example settings:
- Collection name: my-test-collection
- What’s the use case? Global search
- What to use for search? Simple Single embedding
- Choose dimensions: 1024 (what our embedding model supports)
Now, we should have our database ready to populate.
Step 2: Set up your n8n workflow
We previously created a workflow to fetch user feedback text data from Google Sheets and split out the rows, ready for processing:
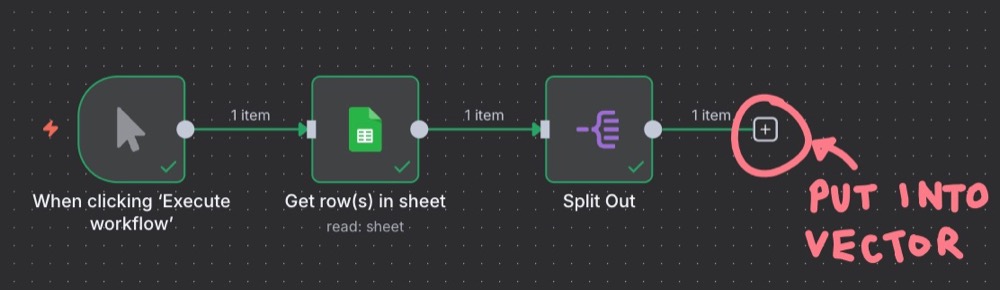
Our goal is to insert each row of user feedback into the vector store, so we can conduct searches on that text data. But first, since we’re just testing this out, let’s put a limit on the data we fetch from Google Sheets, just to make it easier and faster to develop.
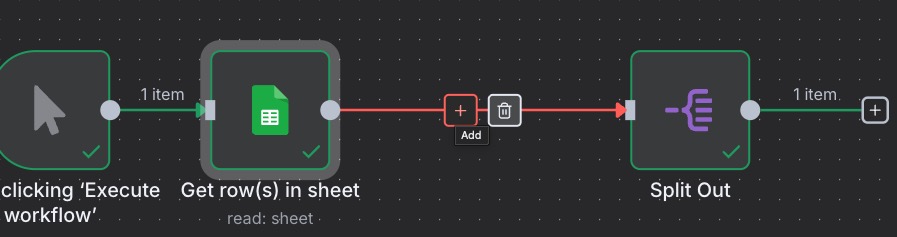
Add a node between Google Sheets and Split Out, and add the “Limit” node:

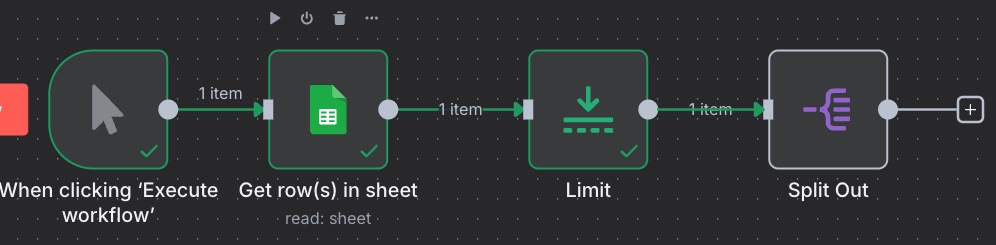
We can set the Max items to 3. So, then our workflow looks like this.
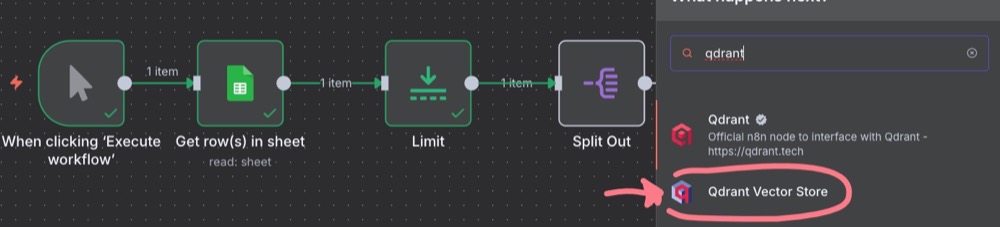
Next, we want to add our main Qdrant node. The node we want is “Qdrant Vector Store”, and then “Add documents to vector store”.
For settings, we don’t need an API key; we just need to enter the Qdrant URL.
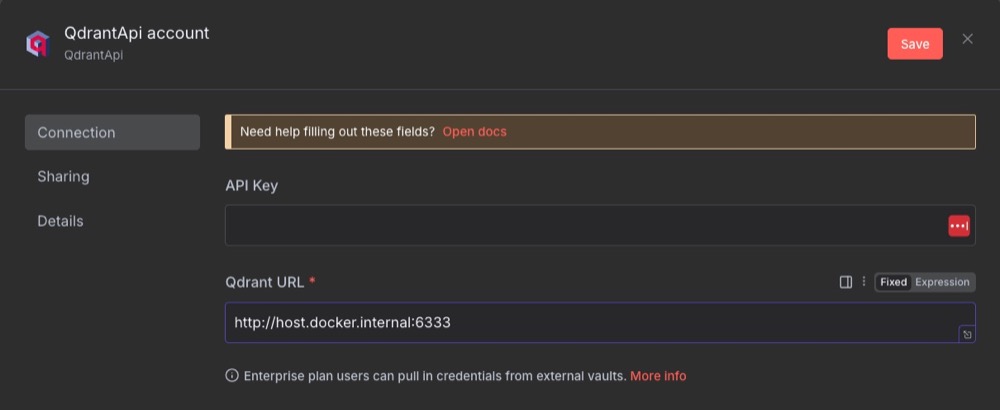
We’re using http://host.docker.internal:6333 as n8n is running inside Docker. And we want to tell n8n to look at the Docker host (our local machine) and then port 6333.
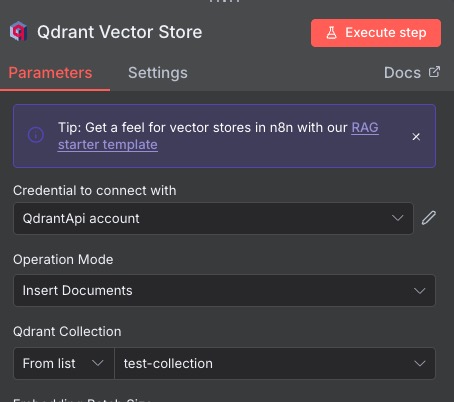
We also need to select the Qdrant collection we’re going to be saving our data to. If we execute, we’ll get an error, because there are two subnodes that we need to add:
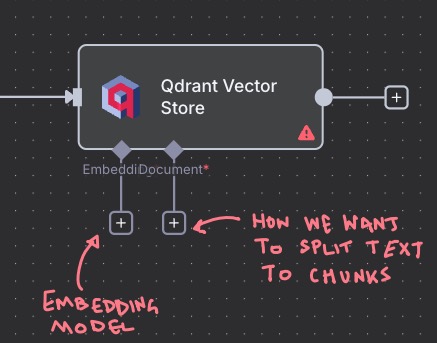
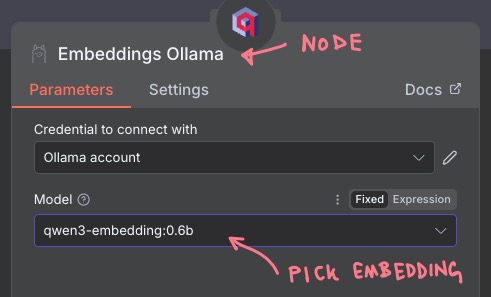
For the embedding, pick the “Embeddings Ollama” subnode, and pick your embedding model (i.e., “qwen3-embedding:0.6b”).
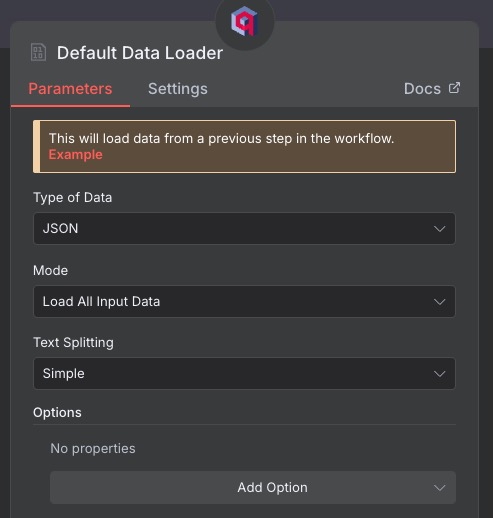
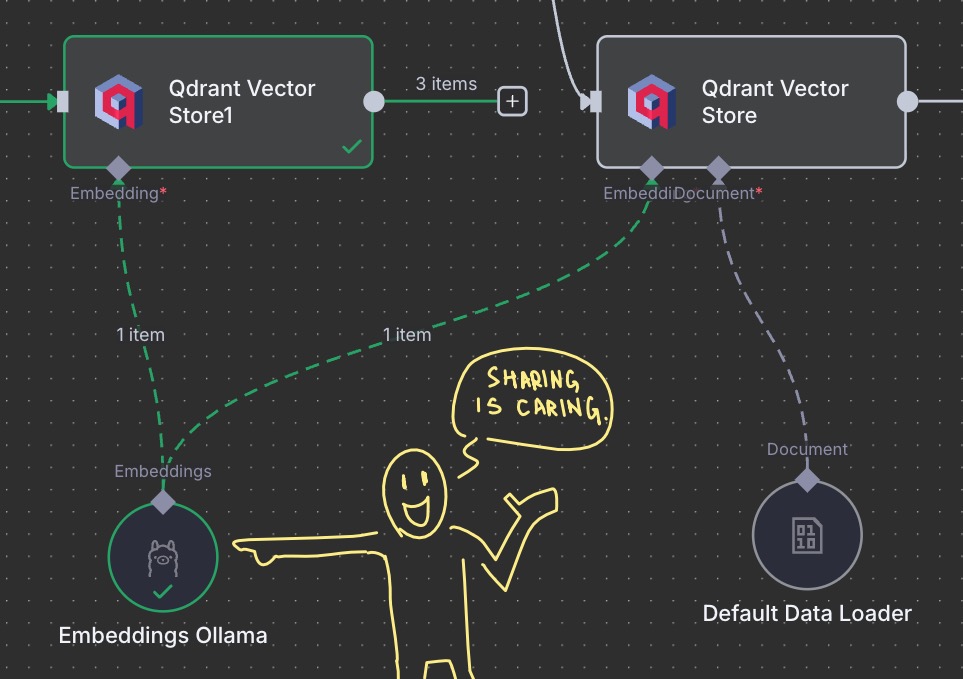
And for the “Document” subnode, pick “Default Data Loader” and stick with the defaults:
Our final workflow should look like this:

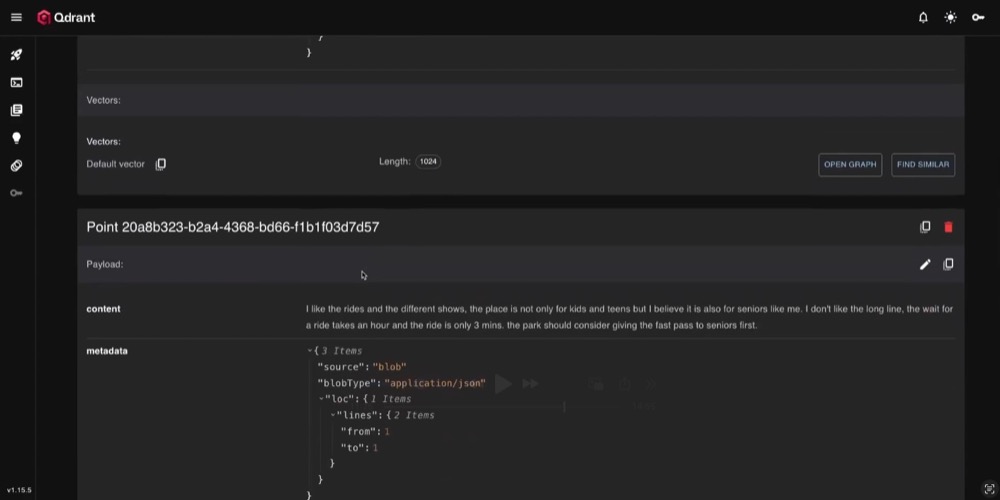
And when we run the workflow, and head over to our Qdrant dashboard, we should see some documents. Yay!
Now that we’ve validated it works, we can remove the limit and feed all the data into Qdrant to populate. Then we’re ready for the fun part: search our database.
Step 3: Search the vector store
Here is what we build in order to fetch items from the vector store.
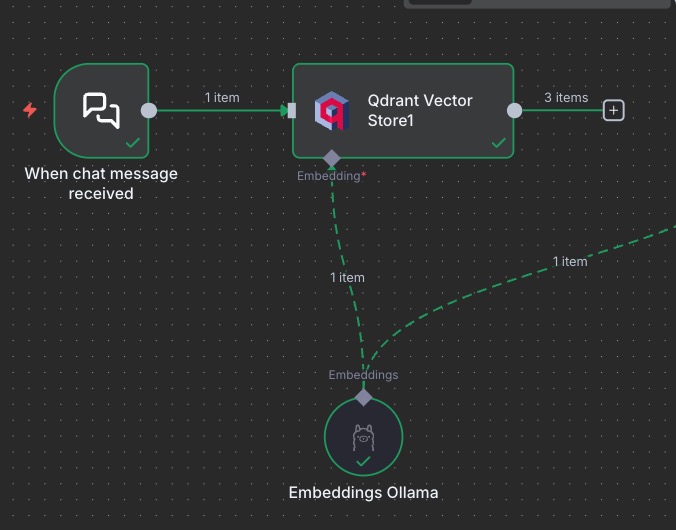
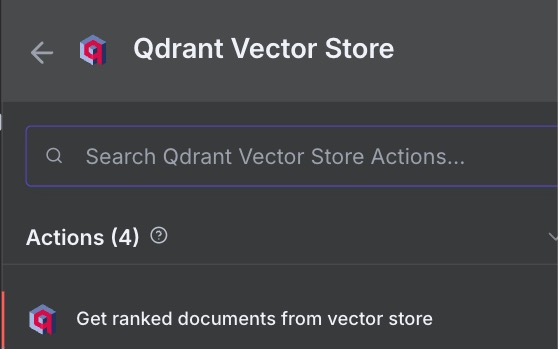
In short, we create a new Chat trigger, add a new Qdrant node, this time with the action: “Get ranked documents from vector store”. Then we share the embeddings subnode.
Here’s the Qdrant action node for retrieval:
For the embedding subnode, we can just share the Embeddings Ollama we set up for our previous Qdrant node. It’s just easier, as they both need to be identical anyway.
Now, trigger the chat with something, like a simple “my prompt”, then edit the retrieval Qdrant node, using the chat input as the prompt (drag your message into the prompt field). You can also set the number of items you want Qdrant to return.
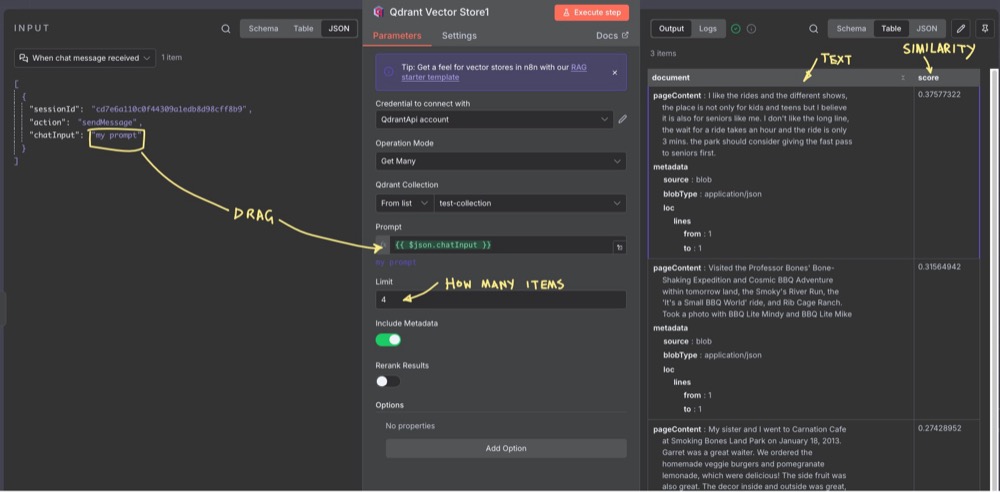
Once you execute, you’ll get an output with the text matching the search, along with the similarity score! Obviously, in the example above, the score is low as we were using some placeholder text as an example.
Summary
And there we have it! In this guide, we’ve tackled one of the most powerful concepts in modern AI workflows: Retrieval-Augmented Generation (RAG). We’ve explored how to create effective workflows that handle large volumes of user text data. We’ve tackled the problem of scaling LLM prompts by using a vector storage database to retrieve relevant text based on semantic similarity. It’s kind of like a smart library of all our user feedback.
Come back next time to build on these tools and techniques.
Editor’s note: This guide is part of a broader series on building practical AI systems. To understand the full workflow progression, explore our guides on getting started with AI automation in n8n, building your first AI agent, connecting Google Sheets to n8n, extracting themes from user feedback with n8n, quantifying feedback themes, and connecting chat interfaces to real tools.

Written By
Iqbal Ali
Edited By
Carmen Apostu