How to Connect Google Sheets to n8n for Efficient Data Handling
We’ve done quite a bit in n8n, but we haven’t really created any meaningful connections. And by meaningful connections, I mean connecting to the likes of Google, Slack, Airtable, or other tools you might be using.
So far, we have a manual process for entering user text into a chatbot and having our local model extract insights from it. What if we had hundreds or thousands of insights stored in a spreadsheet like Google Sheets?
Something like this:

In this instance, we need to connect our n8n to Google Sheets, so we can process each row of the sheet.
What are connections?
Connections allow n8n to “talk” to other tools. Note: this won’t be a definitive view of all the possible connections you can have in n8n—there are lots. Instead, I want to focus on the one that I personally find the most complicated to set up. I’m not alone on this, either. A few people have mentioned the pain of connecting Google Sheets to n8n.
So, let’s set up a Google Sheets connection and fetch spreadsheet rows to iterate over. I promise it’s actually not as complicated as I used to think it was.
We’ll start in n8n with a simple trigger. Then, for the next node, search “Sheets” and select the “Google Sheets” option.

We’ll be presented with a list of actions. These are nodes that do “specific” things. We want to select “Get row(s) in sheet” since we want to fetch rows from our Google Sheet.

And straight away, we’re hit with this intimidating screen.

Right at the top of this screen, we’re prompted to “Select Credential”. When we click on it, we’re asked to “Create a new credential”.

Okay, let’s take this step-by-step. There are three key things to focus on here:
- OAuth2: This is how we want to connect to Google. We want to sign in using our Google username and password. n8n and Google then do their secret handshake and then we’re all connected.
- OAuth Redirect URL: After we sign in to Google, Google needs to know where to redirect us. If you’re running this on your local machine, this will be http://localhost address. Hang tight with this, you’ll need to copy and paste when the time is right.
- Client ID and Client Secret: We need to enter these secret keys so Google can grant n8n access.
So, how do we do this? There’s three steps.
- Create a project
- Enable Google Sheets API access
- Set up oAuth screen
- Create the credentials for access
Let’s take these step-by-step.
Setting up the Google connection
Step 1: Create a project
Go to https://console.cloud.google.com/ and from the top header, select the button next to Google Cloud. You will likely have “Select a project” as the button text. You will also be prompted to accept the terms of service. Go ahead and accept those.
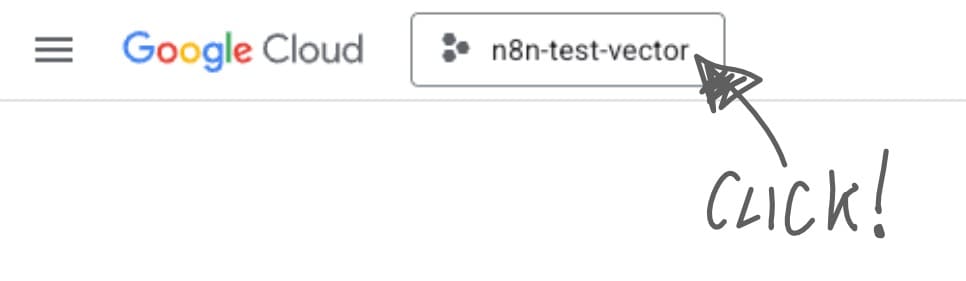
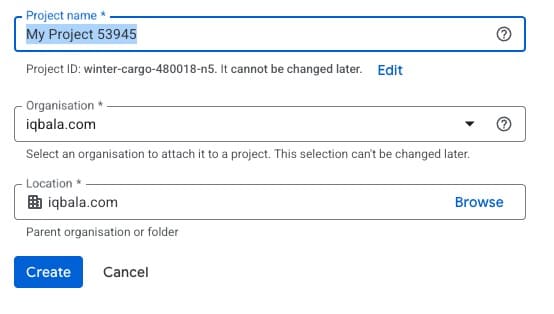
Create a new project and name it whatever you want. I’d advise having “n8n” in the name so you know what it is later.
After you’ve created the project, make sure you’ve selected the project (the button next to Google Cloud should read the name of your project).
Step 2: Enable Google Sheets API for the Project
With the project selected, click the left navigation, select “API and Services”, then “Enabled APIs and Services”.

After that, search for “sheets” and then select “Google Sheets API”, and then enable it.

Great. We now have a project enabled for the Google Sheets API. We now need to set up the authentication screen and get the secret credentials.
Step 3: Set up the OAuth consent screen
We can now set up the OAuth screen that we’ll access from n8n.

We’ll get a screen like this:

Hit “Get started” and then fill in the following form:

Pick a name like “n8n_web”, enter your email address, then in Audience select “External”. It’s just easier.

And then the other two parts are easy: your email address again, and accept their terms.
We’re almost there! We now just need to set up the credentials, and we’re ready to go.
Step 4: Creating Credentials
Finally, let’s create some credentials.

Then, on the next screen, click the “Create credentials” button. You want to create “OAuth client ID”, then choose “Web application”:

We need to pick another name or just leave it with the default (yes, I know, I lost track of all the names I give things, but don’t worry, we don’t need to remember these).
Now, add an authorised redirect URL and in the box, enter the callback URL from the n8n credential screen.

This is mine:

Hit create, then copy and paste these somewhere safe. Or just paste them directly into the n8n screen.

Once we paste them into n8n, “Sign in with Google”. And we’re connected!

Get data from Google Sheets
Now that we’ve got our connection sorted, we can start doing the fun stuff.

On the node configuration screen, here’s a breakdown of what we need to know:
- Resource: Sheet Within Document is fine as a default since we want to select a specific sheet (or tab) within our Google Sheet rather than the whole document.
- Operation: Get Row(s) is also fine to use the default, since we want to iterate through the rows of the sheet.
The next two fields are where we connect to our spreadsheet.
Document. For me, choosing from a list never works, so instead select “By ID”, and then head to your Google Sheet, and in the URL select the portion of the URL highlighted below:

https://docs.google.com/spreadsheets/d/select-this-as-your-id/edit

Insert the ID and then for Sheet, choose the required sheet from the list. Don’t worry about any filters just yet. We can just test the connection and the fetching of data.
Now, once we hit “Execute step” we should be able to see our data in the output:

Great! We now have data to send as an input to the next steps in workflow.
Filtering Data
Now, say we didn’t want all of the data, but we just wanted everything where the Branch is “Smoking Bones Land Paris” (i.e., we wanted to filter by a specific field value). This is where we can add Filters.

We can simply select the relevant column (in this case “Branch”) and enter the value to filter the results by (i.e., “SmokingBonesLand_Paris”). Execute again, and we have a filtered set of results.
We can create combinations of filters, so this is super powerful. But even after filtering the data, we still have a mass of rows to deal with. The Google Sheets node has just dumped all this data on us, but we need to sort through it row by row.

We could use a loop, but this just gets messy quickly. Thankfully, n8n has a special node (or operator) to help with this. It’s called Split Out. And what this node does is it splits the fields into rows, and feeds each row to the next step.
To use it, add the node:

When you’re setting it up, you’ll see the rows coming in as an input to the operator:

In the node “configuration” part of the Split Out, we drag the property across to the fields to split out. I’m only interested in the “Tell_Us_About_Your_Experience” column, so under “Include”, I’m going to leave the dropdown as “No other fields”.

But keep in mind that we can add the other fields if we want, by updating the “Include” dropdown. Execute the step:
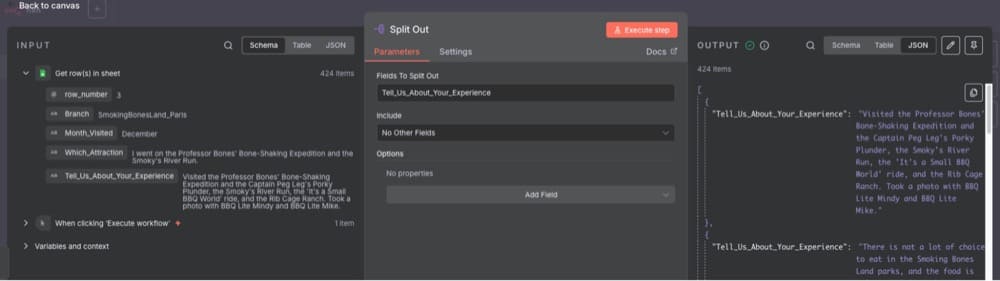
And in the output, you’ll see your list of “Tell_Us_About_Your_Experience” field values. Now, when we add new nodes, we don’t have to worry about complex loops, the Split Out operator feeds data row at a time to the next step.

Conclusion
So there we have it. We’ve created a simple yet powerful connection to Google Sheets, enabling us to import spreadsheet data into n8n. I’ve also shown you how to split things out, so we can build additional nodes with ease without creating complicated loops to iterate over rows.
In the next episode, I’ll take you through vector storage databases. Specifically, we’re going to create a vector storage database and dump all that user feedback into it. Doing so will allow us to search the user feedback based on semantic similarities. This process is also known as RAG (Retrieval Augmented Generation), and is a key component of many powerful AI-based workflows and applications.
Editor’s note: This guide is part of a broader series on building practical AI systems. To see how this data layer fits into larger workflows, explore our guides on getting started with AI automation in n8n, building your first AI agent, building RAG workflows with n8n and Qdrant, extracting themes from user feedback with n8n, and quantifying feedback themes with automation.

Written By
Iqbal Ali
Edited By
Carmen Apostu