Build an n8n Workflow That Extracts, Verifies, and Validates Claims in Your Drafts
Validating claims is important these days. Whether we’re writing a LinkedIn post or an article, we’re exposed to a lot of misinformation, so it’s important to ensure what we post is accurate.
For a really long time now, I’ve been trying to be that guy who’s super organised with my research. Read something interesting or come across an interesting fact? Add it to my second brain. Chanced upon some research while browsing or chatting to someone? Second brain. Hear a mention on the radio while driving? Second brain it somehow.
In reality, I’m very unprepared for insights in my day-to-day life. Instead, I’ll only realise the importance of something when I’m writing a post or article, and in that instance, I’ll need to track down that source again.

Here’s how my process usually goes after having written a rough draft:
- Extract claims from my draft.
- Check numbers: search primary or reliable sources to validate any numbers
- Verify accuracy: Is the claim a misunderstanding of the original text or just plain wrong?
- Document the claims in a way that’s ready to use as references
This process is time-consuming and mostly automatable, so I created an n8n workflow that reduces some of the friction. It doesn’t completely cut out the human. I’d still have some work to do, but my work should be greatly reduced.
If your process is similar to mine and you use n8n, you can download and use the workflow. There’s a link to the workflow at the end of the article. But even if this isn’t directly useful, I think there are some techniques worth taking away to apply to a wider range of workflows.
Either way, I hope this article provides a useful breakdown of this workflow.
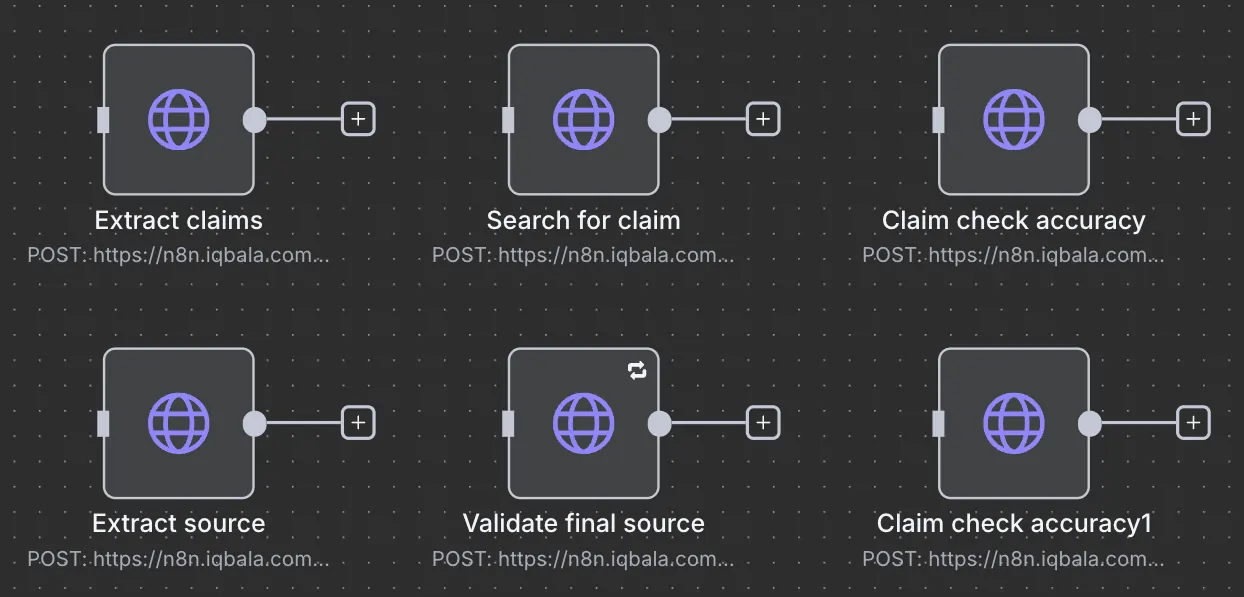
High level overview
At first glance, this seems intimidating. But the key is to focus on the top section:
The top section is the main workflow that makes a number of HTTP Requests to webhooks (those five boxes), each of which performs a specific action. I’ve separated these because I ultimately want to turn them into APIs and further improve them.
Each workflow can be called separately, like a mini-API service. When put together, they deliver a list of claims to a Google spreadsheet like this:

The spreadsheet has five columns: Claim, Source, PublishedDate, Links, and Validated. Hopefully, this should be self-explanatory. It’s worth noting that the workflow errs on the side of caution, so treat “Validated: FALSE” as something to follow up on. It’s not necessarily the case that the claim is invalid; it’s just that the system could not validate it.
n8n tool requirements and set-up
This workflow requires API keys from Exa and Browserless. I’m on the free tier for both, so I have some workarounds to rate-limit the calls to their services (i.e., the two loops in the workflow). If you decide to pay for both services, you can reduce some complexity and benefit from a speed bump.
The tool also requires Google Sheets, but you can export the final output to a location that’s convenient for you.
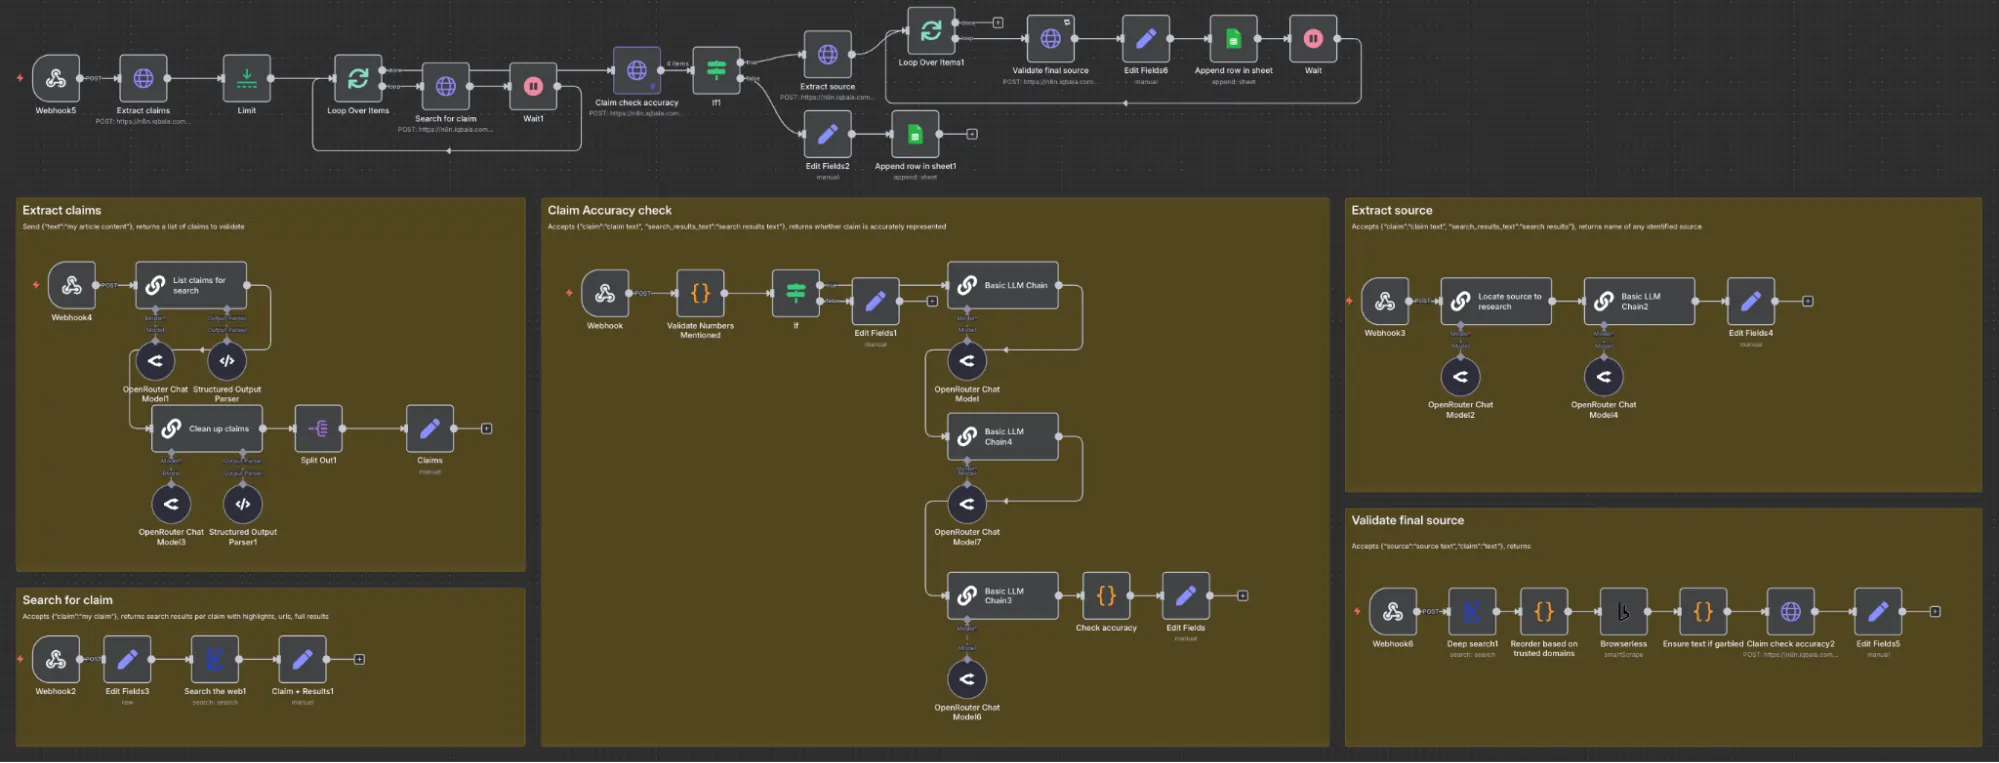
Also, since I’m using HTTP Requests to call the relevant webhooks within the workflow:
There are six HTTP Request calls, each of which calls the relevant webhooks from the five boxed workflows.
Edit the above to match the production URL from the webhook. The names match, so it should be easy to pair them. Notice that “Claim check accuracy” is called twice. Once from within the “Validate final source” workflow.
Before you use it, ensure you activate the workflow, as the production webhook URLs must be enabled. Okay, let’s take a deeper look at the workflow section at a time.
Tour of the workflow
Part 1: Extract the claims
The system takes some text from the webhook (replace with any trigger you like), and sends that text to “Extract claims” workflow:
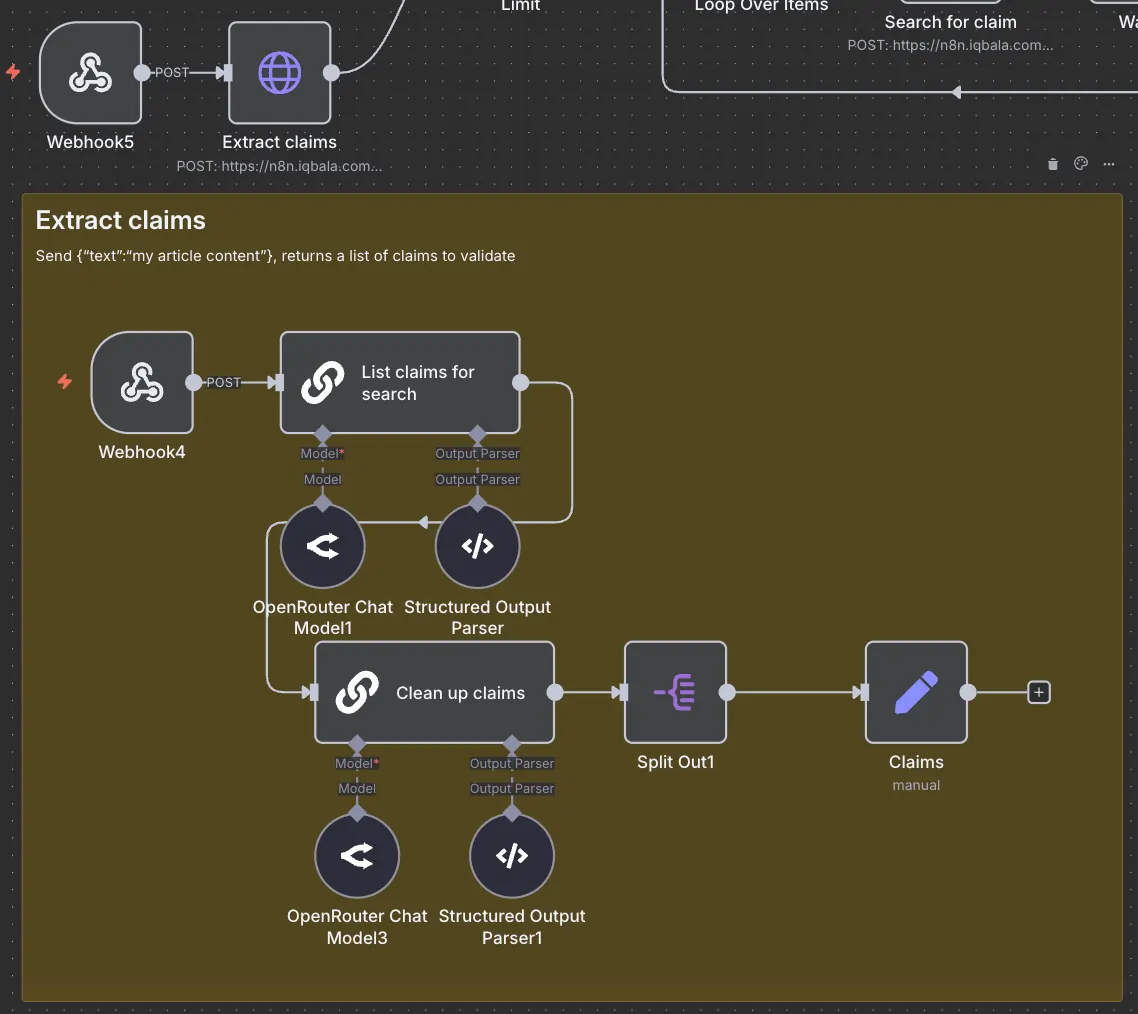
There are two simple AI nodes. One to extract the list of claims, and another to verify claims have been accurately reflected. This process is sometimes referred to as “Self-reflection”. It has been known to improve the accuracy of AI output. You can use two different AI models or the same one. I don’t think it matters much. Obviously, use a small model (I’m using the Gemma 4 model throughout).
“Extract claims” returns a list of concise claims, for example, 20 claims from a rough draft article. When testing, it’s a good idea to limit the list returned to ensure you don’t waste too many resources while debugging. Remember to remove limits after you’re done testing, though!
Part 2: Search for claims
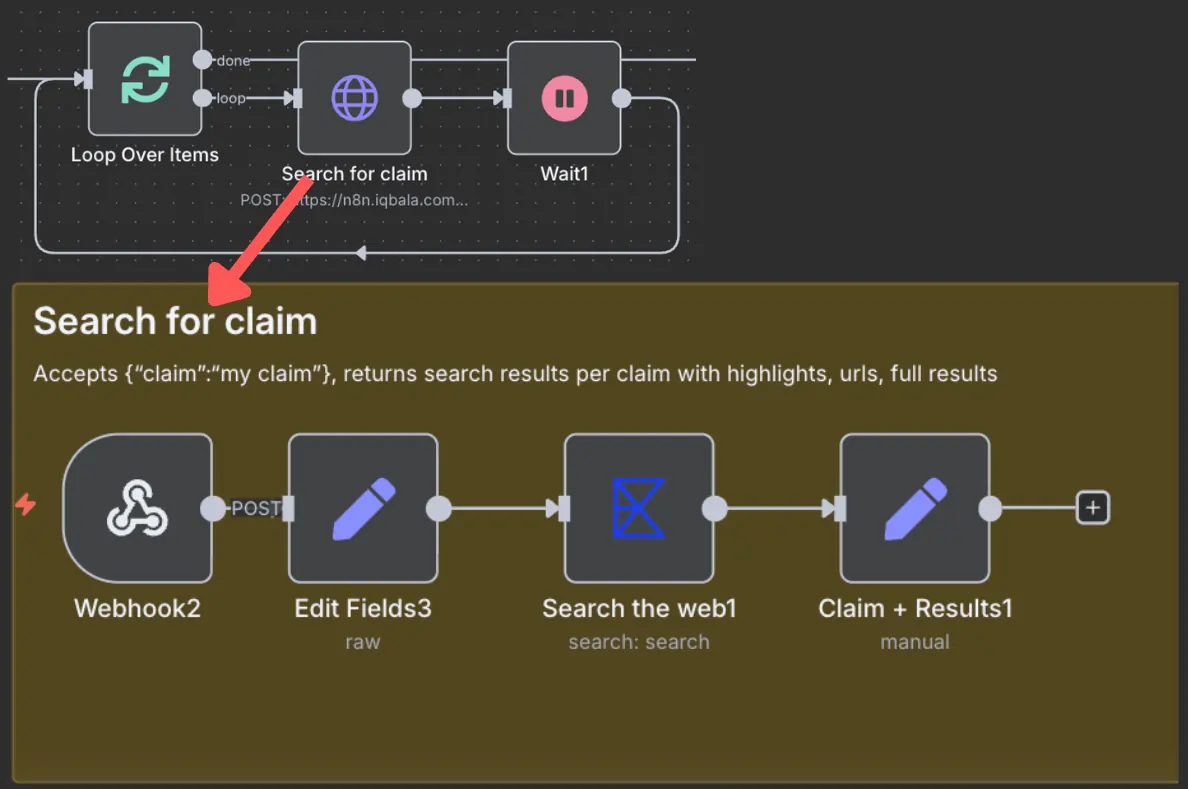
For each extracted claim, an Exa search is conducted. Since Exa rate-limits web searches through their service, I’ve put in a loop to split any list of claims into batches of ten, conduct ten concurrent searches, and then wait one second before continuing with the next batch.
The searches extract “highlights” from the search results and return all these highlights.
Part 3: Run accuracy checks
Each claim and search result text pairing is then checked for accuracy:
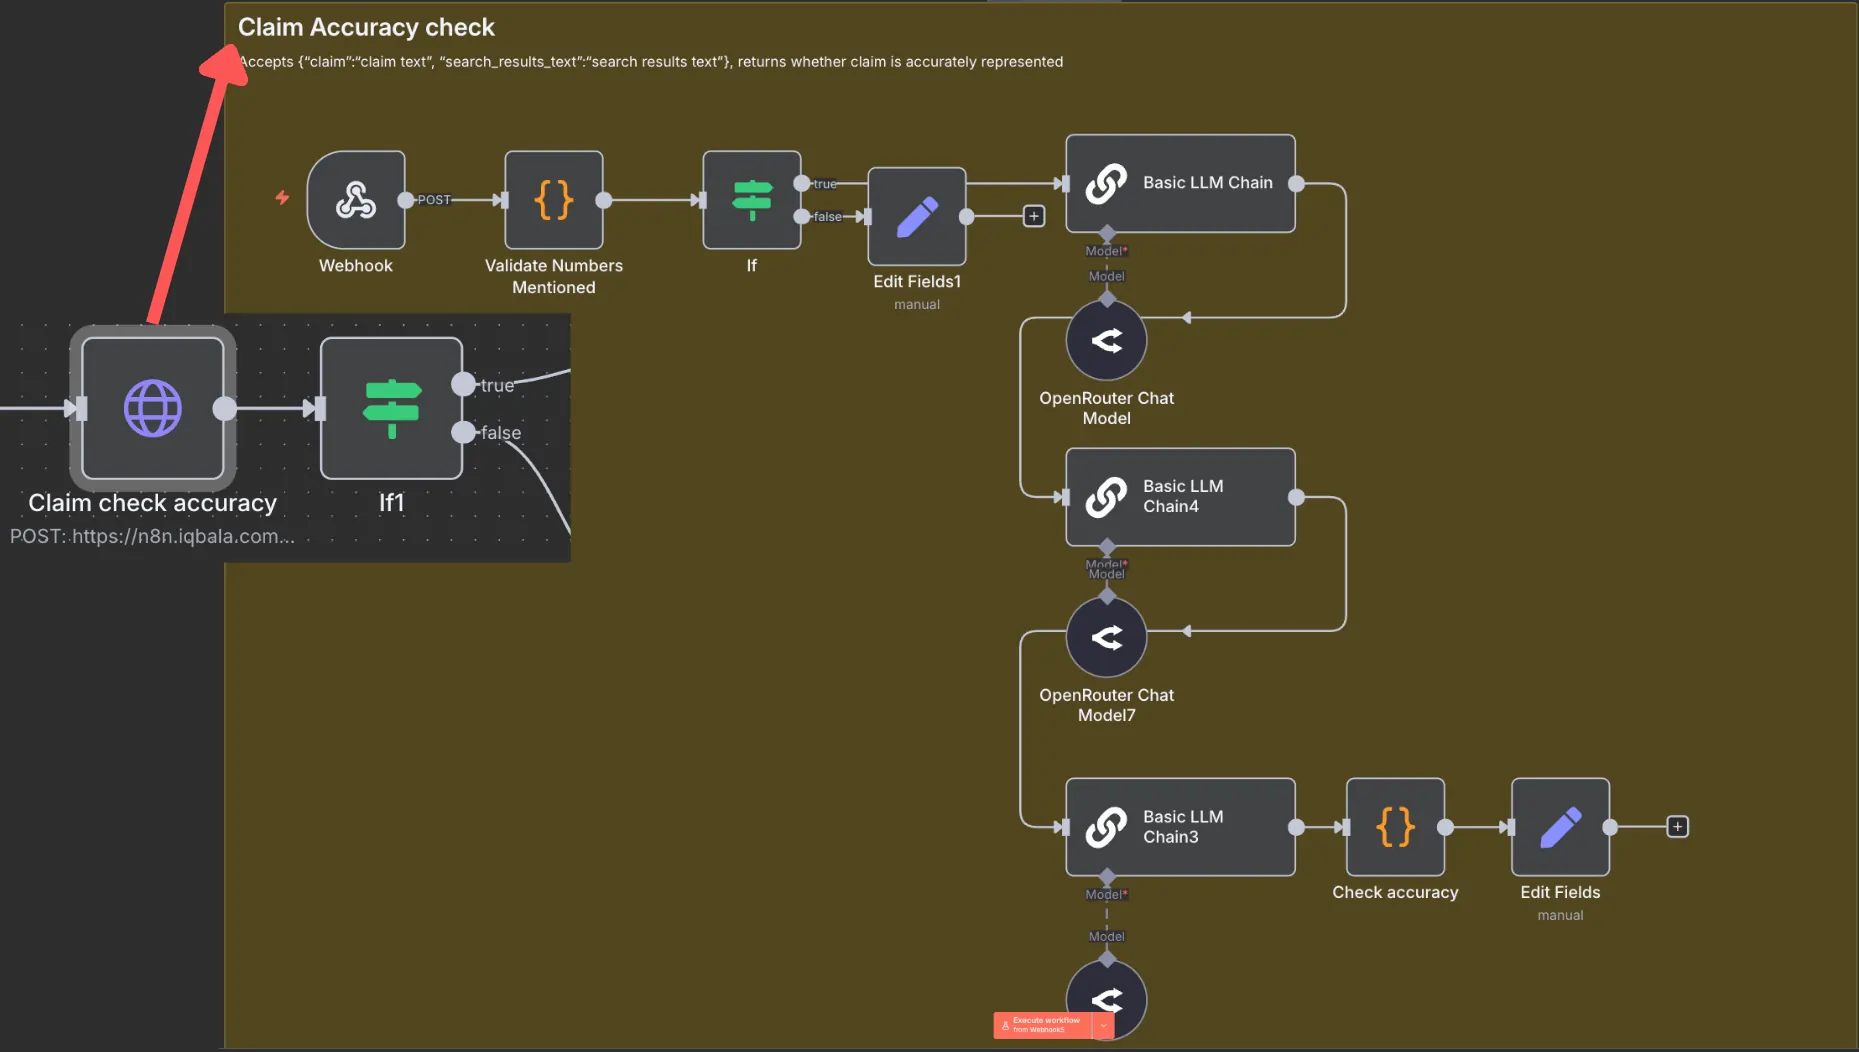
This accuracy check currently consists of:
- Extracting any numbers from the “claim” and checking if the numbers exist in the text.
- Performs a three-step AI check to verify if the claim is an accurate representation of the source text.
I run the text representation check three times to iron out inconsistencies that could cause the AI to mistakenly validate a false claim or invalidate a true one. A different model can be used for each, but I don’t think it particularly matters.
When I develop the API endpoint for this, I’ll probably go back to a single AI call and incorporate a semantic similarity check between the claim and the text to add greater determinism into the process. As it stands, the best-out-of-three approach seems to work fine.
If the claim cannot be validated, the system returns “Validity FALSE” to the spreadsheet next to the claim. It’s a signal for me to do deeper research if I want to keep the claim.
If the claim CAN be validated…
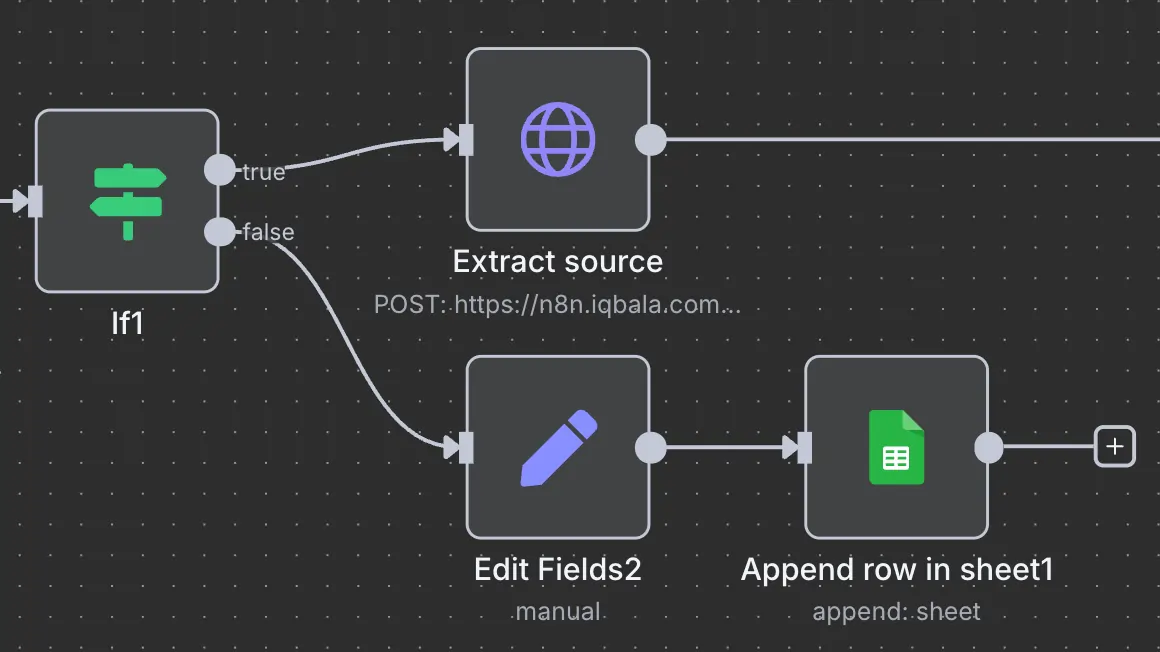
Part 4: Extract sources
The following workflow uses the search texts to locate a source for the claim. The second AI call rewrites the source to be more concise. The two-step approach seems to work better with smaller models. I initially wrote this to work with Llama-3.2 1B model, but changed to Gemma 4 as I haven’t had a chance to test it at scale with the smaller model.
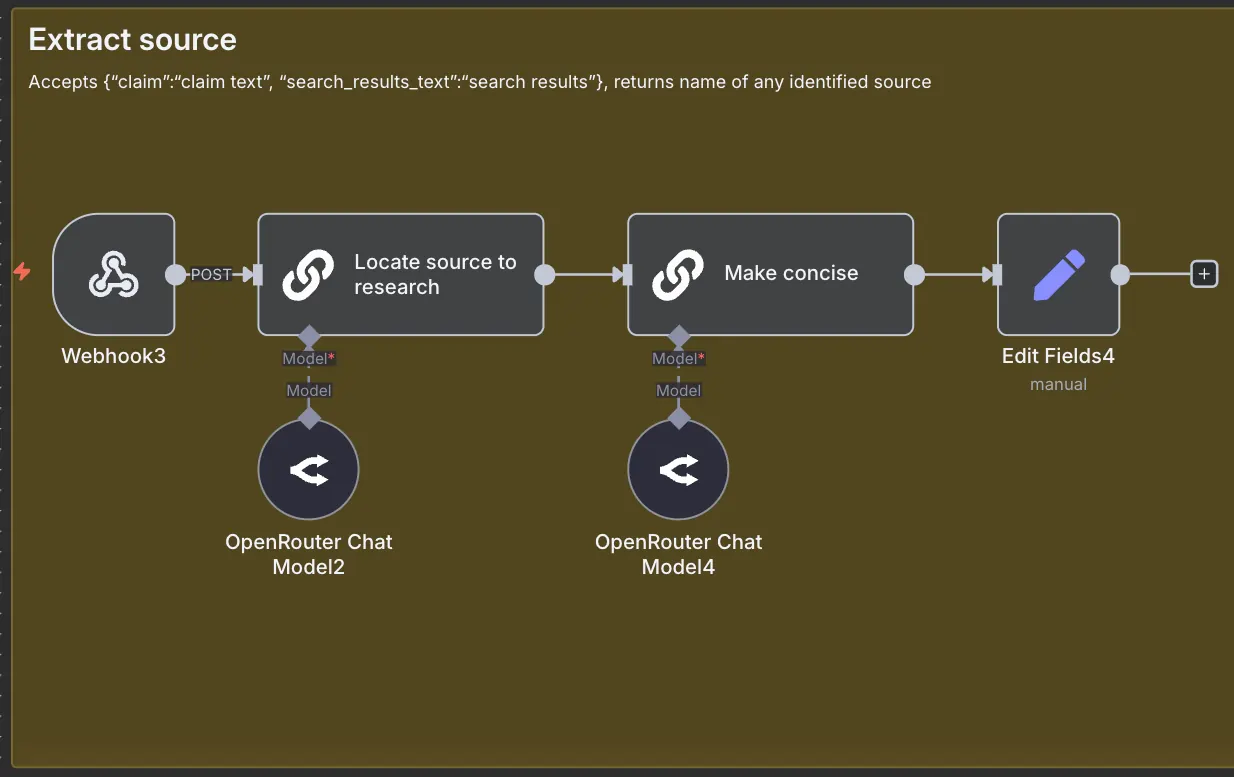
This workflow returns a source for each claim.
Part 5: Validate against trusted sources
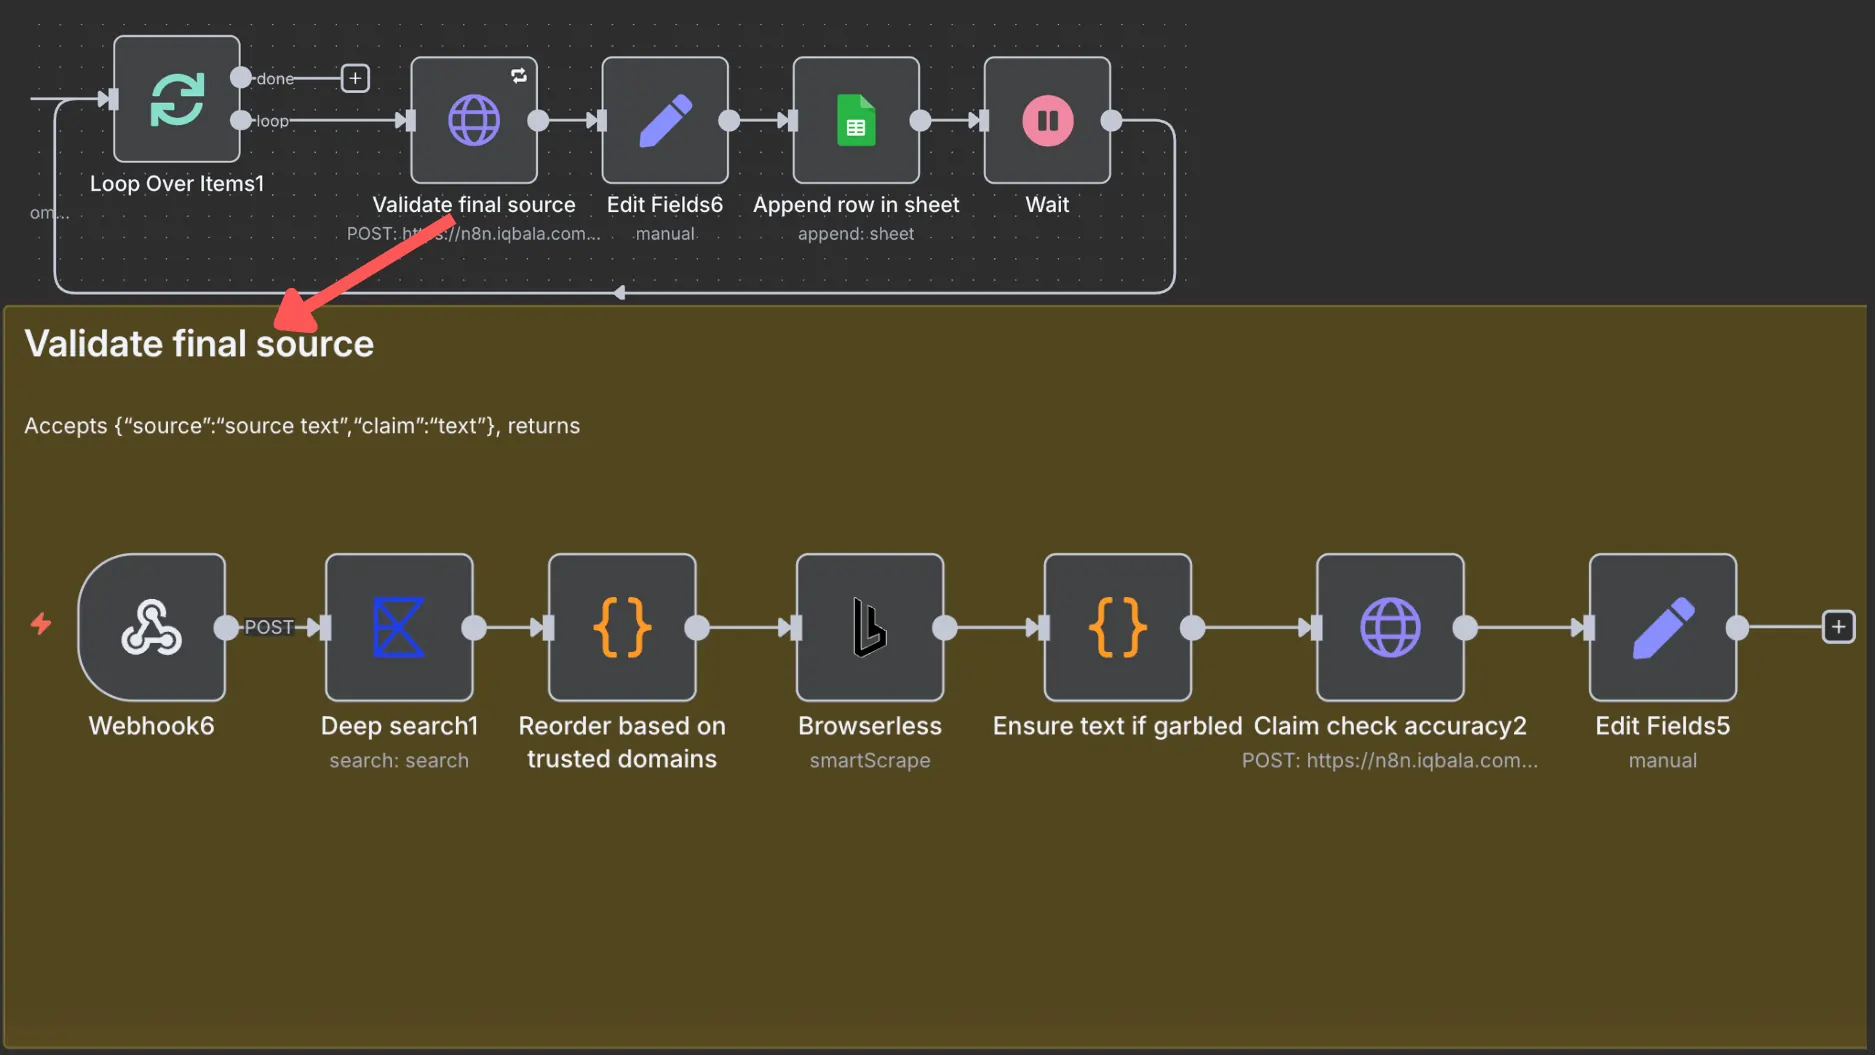
Since there’s so much AI hallucination out there, it’s important to validate claims against primary sources. In this step, each validated claim-source pairing is used to run another search with Exa. Once the results are found, they are ordered by “trust”.
Trusted sources climb to the top. At the moment, this list of trusted domains is hardcoded, but there’s nothing stopping you from maintaining your own list in a spreadsheet and loading it into the “Reorder based on trusted domains” code node.
After that, the most trusted source is passed to the Browserless node, which extracts the page content and passes it for another round of “Claim check accuracy”.
By the way, Browserless is super rate-limited, which is why the batch size for looping is set to 1. This means expect delays unless you’re willing to pay for a Browserless subscription. For me, I don’t mind waiting a few minutes for output.
The “Ensure text if garbled” is there because a lot of claim content is fetched from PDFs and Browserless can often fail to parse PDFs properly.
Anyway, the final output is written out to my spreadsheet. You can optionally add a step to be notified when the entire process is done.
Make it your own
This workflow is far from perfect. It’s still a work in progress. The goal was never to show off this specific workflow, but it was rather to share the techniques behind it. I’ve added multiple validation steps, including deterministic elements such as code-based checks, to make this workflow more reliable. The next step is to turn all those mini-API endpoints into a single API endpoint to make my n8n setup even leaner.
If you want to download and use the workflow, please go ahead. But I invite you to make it your own, and never forget to test whatever you add to ensure it works around the language model’s non-deterministic pitfalls.


Written By
Iqbal Ali
Edited By
Carmen Apostu